×
- Hello
- Login or Register
- Quick Links
- Live Chat
- Track Order
- Parts Availability
- RMA
- Help Center
- Contact Us
- Shop for
- Mazda Parts
My Garage
My Account
Cart
Genuine Mazda 929 Heater Core
HVAC Heater Core- Select Vehicle by Model
- Select Vehicle by VIN
Select Vehicle by Model
orMake
Model
Year
Select Vehicle by VIN
For the most accurate results, select vehicle by your VIN (Vehicle Identification Number).
2 Heater Cores found

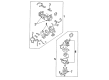
Mazda 929 Core Part Number: HE01-61-A10
$387.88 MSRP: $521.45You Save: $133.57 (26%)Ships in 1-2 Business Days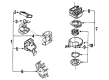
Mazda 929 Heater Core Part Number: HG30-61-A10
$600.59 MSRP: $807.41You Save: $206.82 (26%)Ships in 1-2 Business Days
Mazda 929 Heater Core
Looking for Heater Core with proven quality? Choose OEM Heater Core. Mazda designs and builds them to strict factory specs. Every piece goes through rigorous quality checks. You'll get parts that fit right and work like new. Shop our huge inventory of OEM Mazda 929 parts. Enjoy the highly competitive prices online. Our site is your one-stop shop. Each genuine 929 part includes a manufacturer's warranty. Buy with confidence. Our return policy is simple and hassle-free. In a rush? Choose expedited delivery at checkout. You'll love the streamlined experience from search to checkout to receiving your order.
Mazda 929 Heater Core Parts and Q&A
- Q: How to remove and install the heater core on Mazda 929?A:To access the heater core, disconnect the negative battery cable and remove all the coolant in the radiator before the removal and installation. Then remove the heater hoses in the engine firewall and note the installation of hose clamps to be reinstalled. The duct should be disconnected between the heater box and the blower motor depending on the model or the crush pad and instrument panel pad of the dash should be removed according to some models. In certain 323 models, the center duct can be disconnected or the floor covering under the heater unit can be removed. Should this be necessary, and disconnect the defroster duct(s), and adjust controls to DEF and HOT to disconnect any controlling control cables that might be in the way, and loosen any electrical connection related connectors. Loose the screws or clips attaching the parts of the heater box, or the whole heater unit to reach the heater core. Also make sure that when unhooking the heater unit the coolant does not spill by first plugging the heater hoses. Once the heater core has been removed, check it out and look through any damage and leaks, and may also carry out a leak check. To install it, use mounting clips to hold the new heater core in place, reassemble the heater box and mount the heater unit. Install and reconnect all control cables and defrozer ducts and fit floor cover or center duct where necessary (depending on the model). Lastly, make certain that all electrical connectors are installed, install the instrument panel or crash pad, and attach the hoses of the heating system by ensuring that the clamps are placed in the same position, refill the cooling system to the required level, reconnect the negative battery cable, and then start the engine to verify that the heating system works.
Related Mazda 929 Parts
 Mazda 929 A/C Accumulator
 Mazda 929 A/C Compressor
 Mazda 929 A/C Compressor Clutch
 Mazda 929 A/C Compressor Cut-Out Switches
 Mazda 929 A/C Expansion Valve
 Mazda 929 A/C Hose
 Mazda 929 Blend Door Actuator
 Mazda 929 Blower Motor
 Mazda 929 Blower Motor Resistor
 Mazda 929 Coolant Temperature Sensor
 Mazda 929 Evaporator
 Mazda 929 HVAC Pressure Switch