×
- Hello
- Login or Register
- Quick Links
- Live Chat
- Track Order
- Parts Availability
- RMA
- Help Center
- Contact Us
- Shop for
- Mazda Parts

My Garage
My Account
Cart
Genuine Mazda Protege Hood
Engine Hood- Select Vehicle by Model
- Select Vehicle by VIN
Select Vehicle by Model
orMake
Model
Year
Select Vehicle by VIN
For the most accurate results, select vehicle by your VIN (Vehicle Identification Number).
5 Hoods found

Mazda Protege Hood Part Number: BR70-52-310F
Mazda Protege Hood Part Number: BC1M-52-310P
Mazda Protege Hood Part Number: BB0S-52-310B
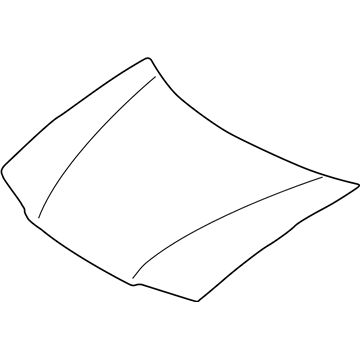
Mazda Protege Hood Part Number: B30D-52-310C
Mazda Protege Hood Part Number: B25D-52-310H
Mazda Protege Hood
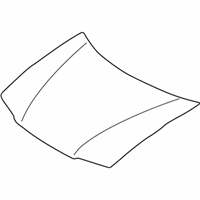
The Mazda Protege Hood is the first line of protection for the engine that shields it against rain, dirt, and other debris, and at the same time it releases easily to allow tune-ups. This cover is attached to robust hinges and lifts upward, making it easy for a beginner to reach belts, fluids, or spark plugs with minimal effort, and the smooth surface on the cover directs air flowing over the roof to ensure the sedan slides with less drag. Most panels in Mazdas were made over the years out of common steel, as this material was considered to be strong and predictable in crumpling during an accident, but some models have changed to using lighter aluminum or fiberglass panels, which reduce weight and offer a little bit more responsive action. Steel models are solid and easy to fix, aluminum trims are lighter and do not rust, and fiberglass models have a gelcoat finish that is already colored, can be painted in any custom color, and are the light of the three models. No matter what style you choose, each Hood is meticulously stamped to fit body lines to the exact match so that there are no gaps and water is kept out. Buyers have the choice of primed skins that will take any type of paint job or glossy pieces of gelcoat that can be bolted on with little preparation; however, in either case the latch and safety catch that Mazda made so perfect at keeping the car fastened stay in place under the original Mazda specification. Smart shoppers always make sure that they fit precisely for the current year to ensure that their second Protege gets the correct Mazda Hood.
Looking for Hood with proven quality? Choose OEM Hood. Mazda designs and builds them to strict factory specs. Every piece goes through rigorous quality checks. You'll get parts that fit right and work like new. Shop our huge inventory of OEM Mazda Protege parts. Enjoy the highly competitive prices online. Our site is your one-stop shop. Each genuine Protege part includes a manufacturer's warranty. Buy with confidence. Our return policy is simple and hassle-free. In a rush? Choose expedited delivery at checkout. You'll love the streamlined experience from search to checkout to receiving your order.
Mazda Protege Hood Parts and Q&A
- Q: How should the hood be removed and installed to ensure proper alignment and secure closure on Mazda Protege?A:The hood is bulky and not very easy to pull out and put in, hence at least two individuals are recommended to carry out this task. A good place to start is to mark around the hinges so that it will be aligned properly when it is being re-assembled. Protect the hood (removing the hood) by placing blankets or pads over the area of the cowl of the body, as well as the fenders. Looseen the windshield washer tube on the hood, and have an assistant hold the hood up, also remove the hinge-to-hood bolts. To install, take off the hood, and invert the uninstallation instructions. To accommodate this, one can slide the hinge plate slot in the fore and aft direction as well as in the sideways direction by loosening the bolts. To determine the movement, take a line round the hinge plate, and then loosen the bolts or nuts and make the hood fit in its proper orientation, and then tighten the hinge bolts to test the fit. When required, the whole Hood Latch system may be moved up-and-down and side-to-side on the radiator support to allow the hood to close properly and completely factory in the fenders. Trace a line around the mounting bolts of hood latch, loosen them, slide the latch assembly and re tighten the mounting bolts till the hood is in contact with the fenders. The hood bumpers are to hold the hood to be even with the fenders and grille when it is closed with the hood latch engage and making sure that the bumpers are somewhat compressed to make sure that they fit correctly. Lubricate the hinges and the hood latch assembly with white lithium-base lubricated grease every so often to avoid binding and wear.
Related Mazda Protege Parts
 Mazda Protege Hood Latch
 Mazda Protege Radiator Support
 Mazda Protege Car Mirror
 Mazda Protege Cigarette Lighter
 Mazda Protege Hood Hinge
 Mazda Protege Hood Release Cable
 Mazda Protege Mirror Cover
 Mazda Protege Seat Switch
 Mazda Protege Trunk Lid Latch
 Mazda Protege Trunk Lock Cylinder
 Mazda Protege Weather Strip
 Mazda Protege Window Run