×
- Hello
- Login or Register
- Quick Links
- Live Chat
- Track Order
- Parts Availability
- RMA
- Help Center
- Contact Us
- Shop for
- Mazda Parts
My Garage
My Account
Cart
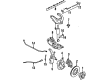
Genuine 1986 Mazda B2000 Ball Joint
Control Arm Joint- Select Vehicle by Model
- Select Vehicle by VIN
Select Vehicle by Model
orMake
Model
Year
Select Vehicle by VIN
For the most accurate results, select vehicle by your VIN (Vehicle Identification Number).
2 Ball Joints found

1986 Mazda B2000 Ball Joint Part Number: 8AU1-34-540
$83.06 MSRP: $110.77You Save: $27.71 (26%)Ships in 1-2 Business DaysProduct Specifications- Other Name: Ball Joint Set; Upper Ball Joint
- Item Weight: 1.90 Pounds
- Condition: New
- Fitment Type: Direct Replacement
- SKU: 8AU1-34-540
- Warranty: This genuine part is guaranteed by Mazda's factory warranty.
1986 Mazda B2000 Ball Joint Part Number: 8AU2-34-510
$89.36 MSRP: $119.18You Save: $29.82 (26%)Ships in 1-2 Business DaysProduct Specifications- Other Name: Ball Joint Set; Lower Ball Joint
- Item Weight: 1.90 Pounds
- Condition: New
- Fitment Type: Direct Replacement
- SKU: 8AU2-34-510
- Warranty: This genuine part is guaranteed by Mazda's factory warranty.
1986 Mazda B2000 Ball Joint Parts and Q&A
- Q: How to remove and install Ball Joints for 2-wheel drive front suspension on 1986 Mazda B2000?A: To access and remove parts that are used in 1972-84 models, one should start by raising the front end and placing it on jackstands and then take off the wheels. Disconnect the bolts of the lower shock absorber and push aside the shock, then disconnect the front stabilizer bar with the control arms. Press on the spring with a floorjack in place of the safety chain or spring compressor and then take off the ball joint nut and unbolt the ball joint off the lower arm. Lower the jack carefully and make sure the spring is attached and then use a separator to loosen the ball joint and arm. To install it, fix the spring on the arm then fit it, loosely fit the ball joint bolts, take out the chain or compressor and tighten the ball joint nut and retaining nuts to 70 ft. lbs. and put everything back again in the opposite order and check the front end alignment. In 1986-89 models, elevate and support the front end, take off the wheel, and remove the cotter pin and nut on the lower ball joint. Take out the lower shock absorber bolt, put a mark on and take out the anchor arm bolt and swivel, and then the torsion bar and the torque plate. Unbolt and detach the torque plate, arm to frame bolt and tension rod making sure the position of the two nuts on the tension rod bushing remains the same. To remove the lower control arm, remove the stabilizer bar and dissociate the lower ball joint with the knuckle. Check wear, remove any damaged parts and check the preload of ball joints. Installation: To install, put a new ball joint in arm, torque the nuts to 70 ft. lbs. and fit the lower arm to frame bracket. Turn the nut of the lower ball joint to 115 ft. lbs. and fit the cotter pin. Install the lower arm-to-frame nut and tighten the bolt to 68 ft. lbs., grease the splines on the torsion bar and fit into the torque plate. Place the same procedure in the anchor arm, after which the anchor bolt and swivel are installed and tightened until matchmarks are made. Install tension rod, torque end bushing nut and low arm end bolts and install stabilizer bar and shock absorber bolt on specified value of torque. Lastly, put in the wheels, raise the vehicle, retorque the lower arm-to-frame bracket nut, check tire pressure and ride height and adjust as required to have less than 10mm difference between sides. Should matchmarks be lost or a new torsion bar be installed place anchor arm on torsion bar with a certain distance to the cross member and then tighten the anchor bolt until it touches the swivel and provide the addition of travel.

