×
- Hello
- Login or Register
- Quick Links
- Live Chat
- Track Order
- Parts Availability
- RMA
- Help Center
- Contact Us
- Shop for
- Mazda Parts
My Garage
My Account
Cart
Genuine Mazda B2000 Ball Joint
Control Arm Joint- Select Vehicle by Model
- Select Vehicle by VIN
Select Vehicle by Model
orMake
Model
Year
Select Vehicle by VIN
For the most accurate results, select vehicle by your VIN (Vehicle Identification Number).
3 Ball Joints found


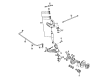
Mazda B2000 Lower Ball Joint Part Number: UC86-34-510A
$112.70 MSRP: $150.30You Save: $37.60 (26%)Ships in 1-2 Business Days
Mazda B2000 Ball Joint Part Number: 8AU1-34-540
$83.06 MSRP: $110.77You Save: $27.71 (26%)Ships in 1-2 Business Days
Mazda B2000 Ball Joint Part Number: 8AU2-34-510
$89.36 MSRP: $119.18You Save: $29.82 (26%)Ships in 1-2 Business Days
Mazda B2000 Ball Joint
Looking for Ball Joint with proven quality? Choose OEM Ball Joint. Mazda designs and builds them to strict factory specs. Every piece goes through rigorous quality checks. You'll get parts that fit right and work like new. Shop our huge inventory of OEM Mazda B2000 parts. Enjoy the highly competitive prices online. Our site is your one-stop shop. Each genuine B2000 part includes a manufacturer's warranty. Buy with confidence. Our return policy is simple and hassle-free. In a rush? Choose expedited delivery at checkout. You'll love the streamlined experience from search to checkout to receiving your order.
Mazda B2000 Ball Joint Parts and Q&A
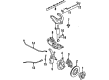
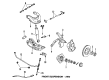
- Q: How to inspect and replace the dust seals and ball joints for 4-wheel drive front suspension on Mazda B2000?A:Check the dust seals on cracks or brittle condition and change them in case of necessity. Test the end play of the ball joints of both upper and lower, and replace any with a greater end play than 0.10mm (0.0039 in.). The starting steps to replacement include lifting and placing of jackstands beneath the frame and the front end of the car, removing the wheels and holding the lower arm elevated with a floor jack to continue replacement. Removal of cotter pin and nut of the upper ball joint and separate it with the knuckle by use of ball joint separator tool. Take the bushings and dust seals off the ends of the upper arm shaft and then the nuts and bolts that hold the upper arm shaft with the support bracket and record the number and position of the shims so that they can be applied when the wheel is in position. Check the components of all parts to wear or damage any components being replaced. Test the ball joint preload using a pull scale and adapter and the reading should be 40 lb. or less when the ball joint stud is shaken. Unbolt and take out the ball joint of the arm, then reattach by reversing the steps of removal, and then torque the upper arm shaft mounting bolts to 60-68 ft. lbs., the ball joint-to-arm bolts to 15-20 ft. lbs. and the ball joint nut to 30-37 ft. lbs.

Related Mazda B2000 Parts
 Mazda B2000 Axle Support Bushings
 Mazda B2000 Control Arm
 Mazda B2000 Control Arm Shaft Kit
 Mazda B2000 Shock Absorber
 Mazda B2000 Steering Knuckle
 Mazda B2000 Strut Housing
 Mazda B2000 Sway Bar Bracket
 Mazda B2000 Sway Bar Bushing
 Mazda B2000 Sway Bar Link Bushing
 Mazda B2000 Torsion Bar
 Mazda B2000 Wheel Bearing
 Mazda B2000 Wheel Bearing Dust Cap