×
- Hello
- Login or Register
- Quick Links
- Live Chat
- Track Order
- Parts Availability
- RMA
- Help Center
- Contact Us
- Shop for
- Mazda Parts
My Garage
My Account
Cart
Genuine 2004 Mazda Tribute Piston
Engine Pistons- Select Vehicle by Model
- Select Vehicle by VIN
Select Vehicle by Model
orMake
Model
Year
Select Vehicle by VIN
For the most accurate results, select vehicle by your VIN (Vehicle Identification Number).
1 Piston found

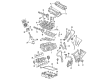
2004 Mazda Tribute Pistons Part Number: ZZCA-11-100
$44.53 MSRP: $59.37You Save: $14.84 (25%)Product Specifications- Other Name: Piston Set; Piston
- Replaced by: ZZCB-23-200
- Item Weight: 1.40 Pounds
- Condition: New
- Fitment Type: Direct Replacement
- SKU: ZZCA-11-100
- Warranty: This genuine part is guaranteed by Mazda's factory warranty.
2004 Mazda Tribute Piston Parts and Q&A
- Q: What steps should be taken before removing the piston and connecting rod assemblies on 2004 Mazda Tribute?A: Before detaching the piston and connecting rod assembly, remove the cylinder head and oil pan, the oil pump pickup tube and windage tray of 1.5L and 1.6L engines. An index of any ridge in the upper extreme of ring travel, say 1/4-inch below the top of each cylinder; when there are ridges caused by deposits of carbon, or wear, they should be taken out with a ridge reamer, otherwise the piston may be broken. Once the ridges have been removed, roll the engine in such a way that the crankshaft is facing up. Test the endplay at the connector rod end using feeler gauges, and remember to check the endplay before the removal of the main bearing cap assembly and connecting rods with the service limit being 0.005 to 0.015 inches. Label every connecting rod and cap with paint or marker (not already marked) and then loosen the connecting rod cap bolts, then remove the number one connecting rod cap and bearer insert without dropping the bearing insert. Insert the connecting rod /piston assembly out through the top of the engine either by hand with a wooden or plastic hammer handle or by hand with a set of screws or pegs. Once the connecting rod caps and bearer inserts have been removed, replace them in their respective rods and store the old bearer inserts before re-assembly so that they will not be damaged. Pistons and connecting rods are now in a condition to check and to overhaul. Pre-check the ring end gaps before the new piston rings are installed, the clearance of the piston ring side must be at the correct level. Arrange the new piston/connecting rod assemblies and new sets of rings and match them during installation. Put the top ring into the first cylinder, align the ring with the cylinder sides and check the end gap using the feeler gauges and make sure that it is within the stipulated range. In case the gap is too narrow, file the ends of the rings carefully to make the gap bigger. This should be repeated with each ring in all the cylinders and each should be matched. After fixing the end gaps, fit the rings on the pistons; first the oil control ring then the middle ring and the top ring, and make sure that they are installed in the proper order. Prior to installation make sure that the cylinder walls are clean, the top edge of each bore at the cylinder bore is chamfered and the crankshaft fitted. Wipe the connecting rod and cap bearing surfaces and fit the new upper bearing insert, but without any lubrication. Place the gaps between the piston rings at equal 90-degree intervals, lubricate the piston and the piston rings, and install the piston ring compressor. Install the piston/connecting rod assembly into the cylinder bore, making sure the connecting rod fits in the crankshaft journal. Measure the clearance between the connecting rod and the oil with Plastigage and make sure that the width of the material crushed is measured correctly. When the clearance is not that as stated, check the bearing inserts and journal diameter and then replace with undersize bearings where needed. Clean off Plastigage, spread a uniform coating of grease or assembly lube to bearing faces, install new connecting rod cap bolts, and torque to value of specified value. Follow the same procedure with the other assemblies making sure that it is clean and well oriented. Lastly, manually rotate the crankshaft to check that it is not bound and to verify that the connecting rod endplay is within limits and make adjustments as needed in case new components have been mounted.
Related 2004 Mazda Tribute Parts
 2004 Mazda Tribute Axle Shaft
 2004 Mazda Tribute Blower Motor
 2004 Mazda Tribute Camshaft Position Sensor
 2004 Mazda Tribute Clutch Master Cylinder
 2004 Mazda Tribute Fuel Pressure Regulator
 2004 Mazda Tribute Ground Cables
 2004 Mazda Tribute Timing Cover Gasket