×
- Hello
- Login or Register
- Quick Links
- Live Chat
- Track Order
- Parts Availability
- RMA
- Help Center
- Contact Us
- Shop for
- Mazda Parts

My Garage
My Account
Cart
Genuine Mazda B2200 Differential
Front Differential- Select Vehicle by Model
- Select Vehicle by VIN
Select Vehicle by Model
orMake
Model
Year
Select Vehicle by VIN
For the most accurate results, select vehicle by your VIN (Vehicle Identification Number).
1 Differential found

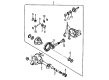
Mazda B2200 Carrier Part Number: M0A7-27-100A
Mazda B2200 Differential
The Mazda B2200 Differential refers to a gear-based assembly. Its job is to split engine torque which is sent between the drive wheels so they can rotate at different speeds during turns and when driving over uneven ground. This prevents tire scrub as well as excessive strain on the drivetrain. This component uses a side gear and ring gear to average out the wheel rotation. For example, if the ring gear turns ten times in a bend, one wheel may turn twelve times and the other wheel may turn eight times. This allows the vehicle to smoothly turn on bends. There are two main types, the open Differential and the limited slip Differential. The first type that will offer almost the same amount of torque to both wheels but will allow the wheel on a slippery surface to spin freely, which will reduce the torque being delivered to that wheel to increase traction. A limited slip model like this has clutch packs and a spring set that biases the torque to the wheel with the better grip. However, the driver will get slip on takeoff if both wheels are on uniform ice. Sufficient lubricant is crucial for either type, as heat, pressure, or moisture can sap fluid levels and cause damage. When the universal joints of the driveshaft get worn out, rear installations may get additional stress; in such cases, they will produce a clanking noise when the drive is switched on. Frequent sound checks and timely fluid checks every few thousand miles ensure the proper functioning of the Differential and maintain the expected cornering behavior of a Mazda. The Mazda drivetrain already benefits from such attention, which will ensure that each Mazda B2200 continues directing power smoothly with predictable handling.
Looking for Differential with proven quality? Choose OEM Differential. Mazda designs and builds them to strict factory specs. Every piece goes through rigorous quality checks. You'll get parts that fit right and work like new. Shop our huge inventory of OEM Mazda B2200 parts. Enjoy the highly competitive prices online. Our site is your one-stop shop. Each genuine B2200 part includes a manufacturer's warranty. Buy with confidence. Our return policy is simple and hassle-free. In a rush? Choose expedited delivery at checkout. You'll love the streamlined experience from search to checkout to receiving your order.
Mazda B2200 Differential Parts and Q&A
- Q:How to remove and install the differential on Mazda B2200?A:To remove the differential from B Series Pickup manufactured from 1989 to 1992, lift the vehicle and support it securely. Remove wheel and tire assemblies. Next, remove the splash shield, drain the differential fluid, and remove the halfshafts. Before unbolting the driveshaft, make a mark on the axle flange. Remove vacuum hoses and electrical connector from freewheel mechanism control box and jack support differential. Take out the crossmember bolts that are located near the lower control arm and lower down the differential/crossmembers assembly assembly from. If necessary, you should remove the crossmembers from the differential and the freewheel mechanism. Reinstall freewheel mechanism if it was removed, then fasten differential to crossmembers for installation. Lift the differential / crossmembers assembly to the proper position, install the crossmember mounting bolts and tighten to 69-85 ft. lbs. After removing the jack, replace the remaining items in reverse order and fill the differential with the correct type and amount of differential fluid. When working on MPV vehicles, the procedures are similar. Raise and support the vehicle, remove the wheel and tire assemblies and splash shield, drain differential fluid, remove halfshafts and mark the driveshaft position, and remove the vacuum hoses and electrical connector. Using a jack, support the differential and take off the bolts/nuts that are securing the differential/freewheel mechanism assembly before lowering it from the vehicle. Keep differential and freewheel mechanism separate, if required. During installation, if the freewheel mechanism had been removed, reinstall it, raise the differential/freewheel mechanism assembly into position, and secure it with bolts/nuts tightened to 49-72 ft. lbs. Reinstall the other components in reverse order. Fill the diff with the right type and quantity of fluid.
Related Mazda B2200 Parts
 Mazda B2200 CV Boot
 Mazda B2200 CV Joint Companion Flange
 Mazda B2200 Differential Bearing
 Mazda B2200 Differential Seal
 Mazda B2200 Drive Shaft
 Mazda B2200 Pinion Bearing
 Mazda B2200 Pinion Washer
 Mazda B2200 Ring And Pinion
 Mazda B2200 Universal Joint
Browse by Year
1993 Differential
1992 Differential
1991 Differential
1990 Differential
1989 Differential
1988 Differential
1987 Differential