×
- Hello
- Login or Register
- Quick Links
- Live Chat
- Track Order
- Parts Availability
- RMA
- Help Center
- Contact Us
- Shop for
- Mazda Parts
My Garage
My Account
Cart
Genuine Mazda MX-5 Miata Oil Pan
Oil Drain Pan- Select Vehicle by Model
- Select Vehicle by VIN
Select Vehicle by Model
orMake
Model
Year
Select Vehicle by VIN
For the most accurate results, select vehicle by your VIN (Vehicle Identification Number).
2 Oil Pans found

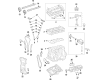
Mazda MX-5 Miata Oil Pan Part Number: PEES-10-400A
$119.26 MSRP: $159.04You Save: $39.78 (26%)Ships in 1-2 Business Days
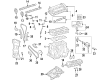
Mazda MX-5 Miata Oil Pan Part Number: LFE2-10-400D
$409.00 MSRP: $549.84You Save: $140.84 (26%)Ships in 1-2 Business Days
Mazda MX-5 Miata Oil Pan
Looking for Oil Pan with proven quality? Choose OEM Oil Pan. Mazda designs and builds them to strict factory specs. Every piece goes through rigorous quality checks. You'll get parts that fit right and work like new. Shop our huge inventory of OEM Mazda MX-5 Miata parts. Enjoy the highly competitive prices online. Our site is your one-stop shop. Each genuine MX-5 Miata part includes a manufacturer's warranty. Buy with confidence. Our return policy is simple and hassle-free. In a rush? Choose expedited delivery at checkout. You'll love the streamlined experience from search to checkout to receiving your order.
Mazda MX-5 Miata Oil Pan Parts and Q&A
- Q: Is removing the oil pan a challenging task due to limited clearance between the oil pan and crossmember on Mazda MX-5 Miata?A:The replacement of the oil pan is also not an easy operation because of the lack of space between the oil pan and crossmember and requires the crossmember be disconnected and lowered. Start by removing the negative battery cable and emptying the oil in the engine. Take out the under cover on the front of the vehicle, remove the steering column on the steering gear and remove the dipstick and dipstick tube. Lift the engine and take out the engine mounting nuts and lift the engine a little higher. Use heavy-duty jack to secure the vehicle and the front crossmember and then remove the crossmember nuts/ bolts and lower the crossmember to provide a clearance. Take out the oil pan-to-transmission and oil pan-to-engine bolts and then use caution when prying off the oil pan in case it is stuck without breaking the mating surfaces. Disassemble the oil strainer of the Oil Pump, and take off the baffle. Installation requires cleaning of all mating surfaces and examining the state of the oil strainer and oil pan flange. Use silicone sealant on the baffle and fit then the oil strainer and a new gasket. Install the new gaskets to the body of the oil pump and the rear cover using RTV sealant. Use RTV sealant around the flange on the oil pan and align the oil pan in place tightening the bolts one at a time. As a rule, after the RTV sealant, wait about 12 hours then put in the oil and replace the oil filter. Once the sealant is dry, start the engine and test against oil leakage. The 2006 and beyond models require the removal of the engine cover, emptying of the engine oil and the battery and battery tray. Loose air filter housing, drive belt, strut bar and disconnect wiring harnesses. Disconnect the mounting bracket of the power steering pump without cutting the hoses and lift up the vehicle and take out the front tires. Disassemble the oil filter, crankshaft position sensor, timing chain cover, and under-cover plate bolts and lift the engine a slight bit. Slacken and loosen gradually the oil pan bolts, then carefully remove the oil pan, by the aid of a rubber mallet, when needed. Wipe and wipe the mating surfaces with clean and greasy material and apply the RTV sealant to the flange of the oil pan and fit the oil pan. Install the bolts on the oil pan in order, put the transverse member and under-cover plate back in place as well as reverse order re-installation, making sure to properly install the crankshaft position sensor.

Related Mazda MX-5 Miata Parts
 Mazda MX-5 Miata Crankshaft Seal
 Mazda MX-5 Miata Cylinder Head
 Mazda MX-5 Miata Exhaust Valve
 Mazda MX-5 Miata Oil Filler Cap
 Mazda MX-5 Miata Oil Filter
 Mazda MX-5 Miata Oil Pump Gasket
 Mazda MX-5 Miata Piston Ring Set
 Mazda MX-5 Miata Timing Belt Tensioner
 Mazda MX-5 Miata Timing Chain Guide
 Mazda MX-5 Miata Timing Cover Gasket
 Mazda MX-5 Miata Valve Spring Retainer
 Mazda MX-5 Miata Variable Timing Sprocket