×
- Hello
- Login or Register
- Quick Links
- Live Chat
- Track Order
- Parts Availability
- RMA
- Help Center
- Contact Us
- Shop for
- Mazda Parts

My Garage
My Account
Cart
Genuine Mazda 929 Sway Bars
Stabilizer Bar- Select Vehicle by Model
- Select Vehicle by VIN
Select Vehicle by Model
orMake
Model
Year
Select Vehicle by VIN
For the most accurate results, select vehicle by your VIN (Vehicle Identification Number).
1 Sway Bars found

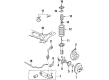
Mazda 929 Stabilizer Bar Part Number: HE21-34-151
$243.33 MSRP: $324.50You Save: $81.17 (26%)Ships in 1-2 Business Days
Mazda 929 Sway Bars
Looking for Sway Bars with proven quality? Choose OEM Sway Bars. Mazda designs and builds them to strict factory specs. Every piece goes through rigorous quality checks. You'll get parts that fit right and work like new. Shop our huge inventory of OEM Mazda 929 parts. Enjoy the highly competitive prices online. Our site is your one-stop shop. Each genuine 929 part includes a manufacturer's warranty. Buy with confidence. Our return policy is simple and hassle-free. In a rush? Choose expedited delivery at checkout. You'll love the streamlined experience from search to checkout to receiving your order.
Mazda 929 Sway Bars Parts and Q&A
- Q:How to remove and install a front Sway Bars and Suspension Strut Rod on Mazda 929?A:To access and fit parts of the vehicle parts of different models, it is best to start by lifting the vehicle and leaving it to rest firmly. On the 1979-82 626, the suspension arm suspension strut rod will have its suspension strut rod nut attachments removed, the suspension strut rod nuts, washers, and rubber bushings removed, then the control rod assembly and suspension strut rod removed. Then remove the sway bars support plate and bushings, and fit the new sway bar bushings with the open end facing forward and reassemble the control rod and suspension strut rod, using their nuts and washers and lower the vehicle. In the case of the 1983-85 GLC, the locknuts on both sides are unlocked, the washers and bushings are removed, the spacer and the bolt that connects the sway bar to the front suspension are removed, followed by the removal of the sway bar bushing on the body by using machine screws and a U-shaped clip. The procedure of re-installation is in the reversal order with proper torque requirements. In the 1983-89 626, MX-6, and 929 models, it is again similar, the nuts and machine screws having individual torque values, the U-shaped rubber bushings being aligned. In the case of the 1986-89 323, once the vehicle has been raised, unattached the parts between the sway bars and the lower arm, examine the parts and replace the bushings with the seam facing towards the back. Tighten the sway bars bushing and bracket bolts to desired torque, making sure that the control link has shown the control link thread exposure. RX-7 1979-85: remove gravel shield, suspension strut rod and sway bars attachment, then add sway bars brackets and control connections, make sure thread protrusion is correct and nuts are fastened tight. With the 1986-89 RX-7, the same thing goes around, checking for any damage, making sure that the bushings are properly adjusted, and ensuring that the bracket and control link bolts are tightened to the correct torque, after the vehicle is lowered.
Related Mazda 929 Parts
 Mazda 929 Axle Bearing Lock Rings
 Mazda 929 Bump Stop
 Mazda 929 Coil Spring Insulator
 Mazda 929 Control Arm
 Mazda 929 Differential Mount
 Mazda 929 Radius Arm
 Mazda 929 Shock Absorber
 Mazda 929 Steering Knuckle
 Mazda 929 Suspension Strut Rod
 Mazda 929 Sway Bar Link Bushing
 Mazda 929 Wheel Bearing
 Mazda 929 Wheel Seal