×
- Hello
- Login or Register
- Quick Links
- Live Chat
- Track Order
- Parts Availability
- RMA
- Help Center
- Contact Us
- Shop for
- Mazda Parts
My Garage
My Account
Cart
Genuine Mazda B2000 Belt Tensioner
- Select Vehicle by Model
- Select Vehicle by VIN
Select Vehicle by Model
orMake
Model
Year
Select Vehicle by VIN
For the most accurate results, select vehicle by your VIN (Vehicle Identification Number).
1 Belt Tensioner found

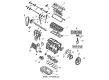
Mazda B2000 Tensioner Part Number: F805-12-700A
Mazda B2000 Belt Tensioner
Looking for Belt Tensioner with proven quality? Choose OEM Belt Tensioner. Mazda designs and builds them to strict factory specs. Every piece goes through rigorous quality checks. You'll get parts that fit right and work like new. Shop our huge inventory of OEM Mazda B2000 parts. Enjoy the highly competitive prices online. Our site is your one-stop shop. Each genuine B2000 part includes a manufacturer's warranty. Buy with confidence. Our return policy is simple and hassle-free. In a rush? Choose expedited delivery at checkout. You'll love the streamlined experience from search to checkout to receiving your order.
Mazda B2000 Belt Tensioner Parts and Q&A
- Q: How to remove and install the belt tensioner and other engine components on Mazda B2000?A:In order to take out and install the parts, begin by loosening the alternator mounting bolts, loosening the belt tension, and detaching the alternator belt. The next step is the removal of the attaching bolts to remove the upper front cover and the gasket, and then rotate the engine in the normal direction until the camshaft pulley mark aligns with the V-notch at the top of the front housing, and the crankshaft pulley notch aligns with the arrow on the front housing except in the case of a belt having jumped time. A tool such as the brake pliers or otherwise, can be used to take the tensioning spring away, then the bolt in the tensioner is removed and then take the tensioner. Check the tensioner: It must rotate free and smooth and in case it does not change it. Make sure you keep the belt into the three sprockets and the crankshaft and the camshaft sprockets are timed accordingly. Install the tensioner with the hole of the mounting bolt at the center of the bolt hole, mount the bolt but not tightening. Install the tensioner spring then with the help of a wrench looseness around the crankshaft pulley, rotate the engine in the usual direction, rotating the engine, by a full two turns, until the timing marks are in alignment again, tightening the lockbolt to 28-38 ft.lb. Lastly, replace the cover gasket, place the upper cover, and the alternator belt back in the same order of install removing it and then tighten the bolts to 57 ft.lb.
Related Mazda B2000 Parts
 Mazda B2000 Cam Gear
 Mazda B2000 Crankshaft Pulley
 Mazda B2000 Crankshaft Timing Gear
 Mazda B2000 Cylinder Head Gasket
 Mazda B2000 Exhaust Valve
 Mazda B2000 Oil Filter
 Mazda B2000 Oil Pan Baffle
 Mazda B2000 Piston Ring Set
 Mazda B2000 Rod Bearing
 Mazda B2000 Timing Belt
 Mazda B2000 Timing Cover Gasket
 Mazda B2000 Valve Guide