×
- Hello
- Login or Register
- Quick Links
- Live Chat
- Track Order
- Parts Availability
- RMA
- Help Center
- Contact Us
- Shop for
- Mazda Parts

My Garage
My Account
Cart
Genuine Mazda GLC Coil Springs
Strut Spring- Select Vehicle by Model
- Select Vehicle by VIN
Select Vehicle by Model
orMake
Model
Year
Select Vehicle by VIN
For the most accurate results, select vehicle by your VIN (Vehicle Identification Number).
1 Coil Springs found
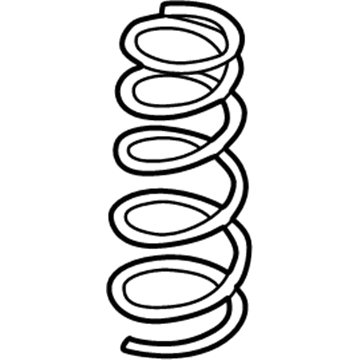
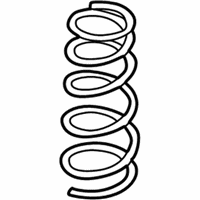
Mazda GLC Coil Spring Part Number: B044-28-011A
Mazda GLC Coil Springs
Looking for Coil Springs with proven quality? Choose OEM Coil Springs. Mazda designs and builds them to strict factory specs. Every piece goes through rigorous quality checks. You'll get parts that fit right and work like new. Shop our huge inventory of OEM Mazda GLC parts. Enjoy the highly competitive prices online. Our site is your one-stop shop. Each genuine GLC part includes a manufacturer's warranty. Buy with confidence. Our return policy is simple and hassle-free. In a rush? Choose expedited delivery at checkout. You'll love the streamlined experience from search to checkout to receiving your order.
Mazda GLC Coil Springs Parts and Q&A
- Q:How to remove and install Coil Springs components on Mazda GLC?A:To remove and install components on the GLC Wagon, start by removing the wheel cover and loosening the lug nuts, then raise the back end of the car and support it with jackstands. Remove the lug nuts and the wheel, followed by supporting the rear axle housing with jackstands. Disconnect the lower part of the shock from the spring clamp, unfasten the nuts securing the U-bolt, and withdraw the U-bolt seat, rubber pad, plate, and U-bolt. Unfasten the two bolts and the nut securing the spring pin to the front end of the rear spring, then pry the spring pin out using a large, flat pry bar. Remove the nuts and bolts attaching the rear shackle to the car's body and withdraw the rear spring assembly with its shackle. Remove the shackle assembly from the end of the spring and pull the rubber bushings out from both ends of the spring. When installing the rubber bushings, do not lubricate them, and tighten the U-bolt securing nuts to 30 ft. lbs., along with the spring pin and shackle pin to 14 ft. lbs. For the GLC and 1983-89 626, rear coil spring removal is part of the shock absorber removal operation. For the 1979-82 626, raise the rear end of the vehicle and support it with jackstands, then remove the rear wheel and place a jack under the rear axle housing for support. Remove the shock absorber lower attaching nut, disengage it from the rear axle housing, and remove the lateral rod from the right side of the axle housing. Continue by removing the upper link attaching nut, lower arm attaching nut, and control rod attaching nut, along with the bushings, spacer, and washers. Disengage the rear stabilizer bar from the control rod if equipped, then slowly lower the jack to relieve spring pressure on the lower arm and remove the spring. During installation, ensure the open end of the spring faces the rear axle housing, temporarily tighten all bolts, and after lowering the vehicle, torque to specifications. For the 1979-85 RX-7, raise the rear of the vehicle and support it on jackstands, then remove the rear wheel and support the rear axle under the differential housing with a floor jack. Disconnect the lower shock absorber mounting bolt, upper link, and lower link from the rear axle assembly, as well as the stabilizer bar front ends if equipped. Disconnect the right and left watt links at the rear axle housing, then carefully lower the rear axle housing just enough to remove the coil springs. Install the coil spring with the painted mark positioned closer to the rear axle casing, connect the ends of the stabilizer bar, and tighten the nuts until 0.17 in. (4.3mm) of bolt threads protrude from the nut. When installing the shock absorber on the left-hand side, ensure the lower side attaching bolts have the bolt heads facing inward, and install the rear bolt for each upper link with the bolt heads facing toward the inside of the car. Temporarily tighten all fasteners, lower the car, and fully tighten all fasteners, observing the specified torque values for each component.
Related Mazda GLC Parts
 Mazda GLC Axle Beam Mount
 Mazda GLC Axle Pivot Bushing
 Mazda GLC Ball Joint
 Mazda GLC Bump Stop
 Mazda GLC Control Arm Bushing
 Mazda GLC Lateral Link
 Mazda GLC Spindle
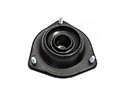 Mazda GLC Strut Mounts
 Mazda GLC Sway Bar Bushing
 Mazda GLC Sway Bar Link Bushing
 Mazda GLC Wheel Bearing
 Mazda GLC Wheel Seal