×
- Hello
- Login or Register
- Quick Links
- Live Chat
- Track Order
- Parts Availability
- RMA
- Help Center
- Contact Us
- Shop for
- Mazda Parts

My Garage
My Account
Cart
Genuine Mazda Millenia A/C Switch
Air Conditioning Switch- Select Vehicle by Model
- Select Vehicle by VIN
Select Vehicle by Model
orMake
Model
Year
Select Vehicle by VIN
For the most accurate results, select vehicle by your VIN (Vehicle Identification Number).
2 A/C Switches found
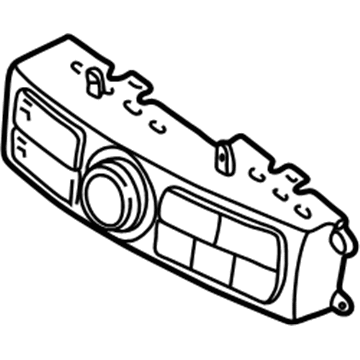
Mazda Millenia Heater Control Part Number: TA01-61-190
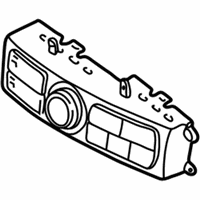
$621.90 MSRP: $849.76You Save: $227.86 (27%)Ships in 1-2 Business DaysMazda Millenia Heater Control Part Number: TC86-61-190F-30
Mazda Millenia A/C Switch
Looking for A/C Switch with proven quality? Choose OEM A/C Switch. Mazda designs and builds them to strict factory specs. Every piece goes through rigorous quality checks. You'll get parts that fit right and work like new. Shop our huge inventory of OEM Mazda Millenia parts. Enjoy the highly competitive prices online. Our site is your one-stop shop. Each genuine Millenia part includes a manufacturer's warranty. Buy with confidence. Our return policy is simple and hassle-free. In a rush? Choose expedited delivery at checkout. You'll love the streamlined experience from search to checkout to receiving your order.
Mazda Millenia A/C Switch Parts and Q&A
- Q:How to remove and install A/C Switch on Mazda Millenia?A:In order to remove and install components in the MX-3, 1990-94 323, and Protege, the first step is disconnect the negative Battery Cable. Next remove the side trim panel from the right side of the dash, followed by the trim panel below the glove box and the center trim panel. Next, remove the upper and lower Instrument Cluster assemblies after disconnecting the electrical connectors from the top assembly. Then, remove the glove box and its lining. Remove the A/C Switch mounting screws and disconnect control cable wires prior to removing the A/C Switch. For installation, reconnect the control cable wires to the A/C Switch and reinstall the A/C Switch. Reinstall the glove box and its lining, the instrument cluster assemblies making sure all electrical connectors are connected, the center trim panel assembly, the trim panel below the glove box, and the side trim panel, and finally, reconnect the negative battery cable. For the 1990-92 626/MX-6, first, disconnect the negative battery cable. Next, remove the bezel cover from the control assembly face and the four screws from the control assembly housing. Take off the sound deadening pads from either side; remove the REC/FRESH control cable, the blower switch electrical connector, and the control assembly illumination connector, followed by the temperature control cable and function selector cable. Remove the control assembly and cables with the assembly and note their routing for installation. To install, position the A/C Switch assembly into the instrument panel, routing the cables as noted. Reconnect the blower switch and illumination connectors. Secure the assembly with the screws. Install the plastic bezel cover and adjust all control cables. Now, reinstall the sound deadening panels. Reconnect the negative battery cable and check for proper operation. For 1993-98 626/MX-6/Probe, disconnect the negative battery cable. Then remove the upper and lower steering wheel panels and the lower dash panel. Disconnect the various switch connectors. Take off the heater control unit mounting screws and pull the unit out. Disconnect the electrical connectors and remove the control unit. Installation is a reverse of removal. Make sure you connect all the electrical connectors and test all the accessories after that. For the Kia Millenia, first remove the negative battery cable. Then, detach the upper and lower steering wheel panels along with the hazard warning switch. This is achieved by taking off the instrument cluster trim panel, unplugging the electrical connector, and unscrewing the switch from the trim panel. Remove the electrical wire connectors from the heater control unit. Remove the retaining screws and remove the control unit. Installation is a reversal of removal. Be careful not to damage plastic trim panel as you tighten the retaining screws.
Related Mazda Millenia Parts
 Mazda Millenia A/C Accumulator
 Mazda Millenia A/C Compressor
 Mazda Millenia A/C Compressor Cut-Out Switches
 Mazda Millenia A/C Condenser
 Mazda Millenia A/C Expansion Valve
 Mazda Millenia Blend Door Actuator
 Mazda Millenia Blower Motor
 Mazda Millenia Cabin Air Filter
 Mazda Millenia Evaporator
 Mazda Millenia Heater Core
 Mazda Millenia HVAC Pressure Switch
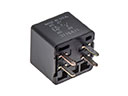 Mazda Millenia HVAC Relay