×
- Hello
- Login or Register
- Quick Links
- Live Chat
- Track Order
- Parts Availability
- RMA
- Help Center
- Contact Us
- Shop for
- Mazda Parts

My Garage
My Account
Cart
Genuine Mazda MPV Alternator Brush
Alternator Brushes- Select Vehicle by Model
- Select Vehicle by VIN
Select Vehicle by Model
orMake
Model
Year
Select Vehicle by VIN
For the most accurate results, select vehicle by your VIN (Vehicle Identification Number).
4 Alternator Brushes found

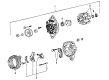
Mazda MPV Brushes Part Number: JE15-18-W77
$8.55 MSRP: $11.40You Save: $2.85 (25%)Ships in 1-2 Business Days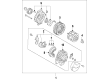
Mazda MPV Brushes Part Number: AJ51-18-W77
$9.91 MSRP: $13.23You Save: $3.32 (26%)Ships in 1-2 Business Days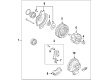
Mazda MPV Brushes Part Number: B3C7-18-W77
$22.49 MSRP: $29.99You Save: $7.50 (26%)Ships in 1-2 Business DaysMazda MPV Brushes Part Number: FE2H-18-W77
Mazda MPV Alternator Brush
Looking for Alternator Brush with proven quality? Choose OEM Alternator Brush. Mazda designs and builds them to strict factory specs. Every piece goes through rigorous quality checks. You'll get parts that fit right and work like new. Shop our huge inventory of OEM Mazda MPV parts. Enjoy the highly competitive prices online. Our site is your one-stop shop. Each genuine MPV part includes a manufacturer's warranty. Buy with confidence. Our return policy is simple and hassle-free. In a rush? Choose expedited delivery at checkout. You'll love the streamlined experience from search to checkout to receiving your order.
Mazda MPV Alternator Brush Parts and Q&A
- Q:How do Voltage Regulator relate to replacing alternator brush on Mazda MPV?A:Removing the Alternator to replace the alternator brushes: First, remove the alternator and label halves on the alternator so that they can be fixed back in place. Then remove the front pulley, and once again, in case there are no air power tools, remove it in an auto service establishment. Unscrew the four bolts which hold the front cover on to the main assembly, then take great care in removing the front cover off the alternator main assembly, being careful not to scratch the main assembly. Make sure that the stator is clamped to the rear cover, and in case the halves are not easily separable, hold the rear part in a vise with a rag in case it gets damaged. Then proceed to take out the rotor, the rectifier and the brush holder mounting screws then disassemble the rear part with the rotor and rectifier/brush assembly. With a soldering iron clean the solder off the brush holder component, without over heating the rectifier. Prior to disassembling, measure the length of the old brushes and must not be more than 0.315 inches and check the brush spring force with a gauge should have a reading of 8.5 ounces at 0.079 inches. In reassembling, insert the brushes in the holder and fasten them with a straightened paper clip. Removal is the opposite of installation which is making sure that the holes of the bolts are aligned and the long bolt is installed at first. Lastly, do not forget to take out the wire holding the brushes together on reassembly. In the case of the rectifier, remove the alternator, decouple the brush holder and rectifier and using an ohmmeter, check continuity on the diodes to determine a shorted diode. Reassembling is done in reverse order so that the wire is pulled out at the end of the process.
Related Mazda MPV Parts
 Mazda MPV Alternator
 Mazda MPV Starter
 Mazda MPV Alternator Bearing
 Mazda MPV Alternator Bracket
 Mazda MPV Alternator Pulley
 Mazda MPV Armature
 Mazda MPV Battery Hold Downs
 Mazda MPV Ground Cables
 Mazda MPV Starter Brush
 Mazda MPV Starter Drive Gear
 Mazda MPV Starter Solenoid
 Mazda MPV Voltage Regulator
Browse by Year
2006 Alternator Brush 2005 Alternator Brush 2004 Alternator Brush 2003 Alternator Brush 2002 Alternator Brush 2001 Alternator Brush 2000 Alternator Brush 1998 Alternator Brush 1997 Alternator Brush 1996 Alternator Brush 1995 Alternator Brush 1994 Alternator Brush 1993 Alternator Brush 1992 Alternator Brush 1991 Alternator Brush 1990 Alternator Brush 1989 Alternator Brush