×
- Hello
- Login or Register
- Quick Links
- Live Chat
- Track Order
- Parts Availability
- RMA
- Help Center
- Contact Us
- Shop for
- Mazda Parts
My Garage
My Account
Cart
Genuine Mazda MX-5 Miata Flywheel
Clutch Flywheel- Select Vehicle by Model
- Select Vehicle by VIN
Select Vehicle by Model
orMake
Model
Year
Select Vehicle by VIN
For the most accurate results, select vehicle by your VIN (Vehicle Identification Number).
4 Flywheels found


Mazda MX-5 Miata Flywheel Part Number: PEES-11-500
$372.34 MSRP: $496.55You Save: $124.21 (26%)Ships in 1-2 Business Days
Mazda MX-5 Miata Drive Plate Part Number: FNE2-19-020B
$145.03 MSRP: $193.40You Save: $48.37 (26%)Ships in 1-2 Business Days

Mazda MX-5 Miata Flywheel Part Number: LF9G-11-500
$184.54 MSRP: $246.10You Save: $61.56 (26%)Ships in 1-2 Business Days
Mazda MX-5 Miata Flywheel Part Number: PE33-16-610A
$1231.33 MSRP: $1682.48You Save: $451.15 (27%)Ships in 1-2 Business Days
Mazda MX-5 Miata Flywheel
Looking for Flywheel with proven quality? Choose OEM Flywheel. Mazda designs and builds them to strict factory specs. Every piece goes through rigorous quality checks. You'll get parts that fit right and work like new. Shop our huge inventory of OEM Mazda MX-5 Miata parts. Enjoy the highly competitive prices online. Our site is your one-stop shop. Each genuine MX-5 Miata part includes a manufacturer's warranty. Buy with confidence. Our return policy is simple and hassle-free. In a rush? Choose expedited delivery at checkout. You'll love the streamlined experience from search to checkout to receiving your order.
Mazda MX-5 Miata Flywheel Parts and Q&A
- Q: How does the Flywheel factor into the removal and reinstallation of a transmission on Mazda MX-5 Miata?A:In order to eliminate the transmission, raise the vehicle and put it on jackstands, then remove the transmission. In models with a manual transmission, disconnect the clutch disc and the cover of the clutch and it may be recommended to check or replace the clutch components and pilot bearing. Draw alignment marks on flywheel/driveplate and engine rear plate so that they are re-installed correctly in future. Unscrew the bolts that have the flywheel/driveplate attached to the crankshaft, poking the flywheel with a screwdriver in case the crankshaft rotates. Never turn the crankshaft with the flywheel/ driveplate removed to ensure the alignment is not lost, so, when this is required, punch alignment marks on both flywheel and crankshaft before removing. Installation Removal of flywheel/driveplate, driveplate backing plate and adapter (Automatic transmission models) taking note of the orientation of plates. Clean flywheel to eliminate grease and oil, look for cracks, grooves, places of burning and score marks on it, and deal with light scoring with emery cloth. Inspect broken teeth on ring gear and inspect warpage with straightedge and have machined in machine shop. Wipe the mating surfaces of the flywheel/driveplate and crankshaft with oil and inspect them, remove the crankshaft rear seal when it is leaking and replace it before installing again. To install it, take any thread sealant out of the holes of the crankshaft flywheel bolts and bolts, and replace the bolts that can not be completely cleaned. Install the flywheel or adapter, driveplate and backing plate to the crankshaft as the marks made during removal. Use thread sealant on threads of used bolts, but not on new bolts. When tightening the bolts apply the screwdriver to ensure the flywheel/driveplate does not rotate, in a criss-cross pattern, working to the final torque in three or four steps. The rest of the sequence is the opposite, in terms of removal.

Related Mazda MX-5 Miata Parts
 Mazda MX-5 Miata Automatic Transmission Filter
 Mazda MX-5 Miata Clutch Disc
 Mazda MX-5 Miata Clutch Fork
 Mazda MX-5 Miata Manual Transmission Extension Housing Seal
 Mazda MX-5 Miata Pilot Bearing
 Mazda MX-5 Miata Pressure Plate
 Mazda MX-5 Miata Transfer Case Gasket
 Mazda MX-5 Miata Transfer Case Seal
 Mazda MX-5 Miata Transmission Assembly
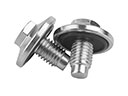 Mazda MX-5 Miata Transmission Drain Plug
 Mazda MX-5 Miata Transmission Gasket
 Mazda MX-5 Miata Transmission Pan