×
- Hello
- Login or Register
- Quick Links
- Live Chat
- Track Order
- Parts Availability
- RMA
- Help Center
- Contact Us
- Shop for
- Mazda Parts

My Garage
My Account
Cart
Genuine Mazda B2200 Torsion Bar
Suspension Torsion Bar- Select Vehicle by Model
- Select Vehicle by VIN
Select Vehicle by Model
orMake
Model
Year
Select Vehicle by VIN
For the most accurate results, select vehicle by your VIN (Vehicle Identification Number).
1 Torsion Bar found

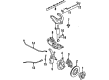
Mazda B2200 Torsion Bar Part Number: UB39-34-011
$218.75 MSRP: $291.72You Save: $72.97 (26%)Ships in 1-2 Business Days
Mazda B2200 Torsion Bar
Looking for Torsion Bar with proven quality? Choose OEM Torsion Bar. Mazda designs and builds them to strict factory specs. Every piece goes through rigorous quality checks. You'll get parts that fit right and work like new. Shop our huge inventory of OEM Mazda B2200 parts. Enjoy the highly competitive prices online. Our site is your one-stop shop. Each genuine B2200 part includes a manufacturer's warranty. Buy with confidence. Our return policy is simple and hassle-free. In a rush? Choose expedited delivery at checkout. You'll love the streamlined experience from search to checkout to receiving your order.
Mazda B2200 Torsion Bar Parts and Q&A
- Q:How to remove and install the Torsion Bar on Mazda B2200?A:Remove the wheel and tire assembly after you have raised and supported the vehicle safely to remove and install AUX. Using a jack, support the lower Control Arm. Then, remove the cotter pin and nut from the lower Ball Joint stud. Lastly, separate the ball joint from the knuckle with the appropriate tool. After that, you will take off the bolt, washer, and nut of the Shock Absorber to lower. Clearly mark the position of the anchor bolt and swivel to aid reassembly before removing them together with the anchor arm, making sure to mark the position of the torsion bar on the anchor arm. Carefully remove the torsion bar. If you are removing both torsion bars, make sure you label their locations because they can't be swapped. After removing the fastening bolts, take away the torque plate, check the torsion bar for being bent or loose and replace if required. To install, start by installing the torque plate and bolting the manifold bolts to specified torque. Apply grease to the serrations of the torsion bar and fit it in the torsional plate so that the mark already done is aligned. Apply grease to the opposite end of the torsion bar and install the anchor arm, aligning it with the marks. Attach the anchor bolt and swivel, tight until the marks align. Attach the shock absorber to the lower control arm, not tightening the nut and bolt, then attach the lower ball joint to the knuckle, tightening the nut and installing a new cotter pin. Reattach the wheel and tire assembly, lower the vehicle, and torque the bolt-and-nut assembly between shock absorber and lower control arm. Carefully check the vehicle ride height by checking the front and rear tire pressures, measuring the distance from the center of each front wheel to the fender brim, and adjusting the torsion spring anchor bolt if required. To complete, examine front end alignment, and if matchmarks for the torsion bar anchor bolt were lost or a new unmarked torsion bar is being installed, position the anchor arm on the torsion bar such that the distance from the lowest point on the arm to the crossmember is specification, then tighten the anchor bolt until the arm contacts the swivel and additional specification travel.
Related Mazda B2200 Parts
 Mazda B2200 Axle Pivot Bushing
 Mazda B2200 Axle Support Bushings
 Mazda B2200 Ball Joint
 Mazda B2200 Control Arm
 Mazda B2200 Shock Absorber
 Mazda B2200 Strut Housing
 Mazda B2200 Suspension Strut Rod
 Mazda B2200 Sway Bar Bracket
 Mazda B2200 Sway Bar Bushing
 Mazda B2200 Sway Bar Link Bushing
 Mazda B2200 Sway Bars
 Mazda B2200 Wheel Bearing Dust Cap