×
- Hello
- Login or Register
- Quick Links
- Live Chat
- Track Order
- Parts Availability
- RMA
- Help Center
- Contact Us
- Shop for
- Mazda Parts
My Garage
My Account
Cart
Genuine Mazda B2200 Control Arm
Suspension Arm- Select Vehicle by Model
- Select Vehicle by VIN
Select Vehicle by Model
orMake
Model
Year
Select Vehicle by VIN
For the most accurate results, select vehicle by your VIN (Vehicle Identification Number).
6 Control Arms found

Mazda B2200 Upper Control Arm Part Number: UB39-34-210A
$115.14 MSRP: $153.54You Save: $38.40 (26%)Ships in 1-2 Business Days
Mazda B2200 Upper Control Arm Part Number: UC86-34-260
$140.93 MSRP: $187.93You Save: $47.00 (26%)Ships in 1-2 Business DaysMazda B2200 Upper Control Arm Part Number: UB39-34-260A
Mazda B2200 Lower Control Arm Part Number: U009-34-350
Mazda B2200 Lower Control Arm Part Number: U009-34-300
Mazda B2200 Upper Control Arm Part Number: UC86-34-210
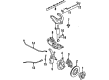
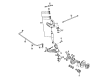
Mazda B2200 Control Arm
Looking for Control Arm with proven quality? Choose OEM Control Arm. Mazda designs and builds them to strict factory specs. Every piece goes through rigorous quality checks. You'll get parts that fit right and work like new. Shop our huge inventory of OEM Mazda B2200 parts. Enjoy the highly competitive prices online. Our site is your one-stop shop. Each genuine B2200 part includes a manufacturer's warranty. Buy with confidence. Our return policy is simple and hassle-free. In a rush? Choose expedited delivery at checkout. You'll love the streamlined experience from search to checkout to receiving your order.
Mazda B2200 Control Arm Parts and Q&A
- Q: How to remove and install the rear lateral rod and control arms on Mazda B2200?A:The process of removing and installing the lateral rod requires the first step, which is raising and securely supporting the vehicle before supporting the axle housing with a jack. Then, extract the lateral rod-to-chassis stud bolt and nut, the lateral rod-to-axle housing nut and remove the lateral rod. Then carefully replace the lateral rod and align the identification mark facing the body and fix it using the mounting hardware. screw-tighten lateral rod-to-axle housing nut to 108-127 ft. lbs. (146-167 Nm) and the lateral rod-to-chassis stud bolt and nuts to 94-127 ft. lbs. (128-167 Nm). In the case of the upper control arms, do the same procedure of elevating and supporting the vehicle and the axle housing using a jack. Take out the upper control arm by removing upper control arm-to-chassis bolt and nut, upper control arm-to-axle housing bolt and nut and removal of upper control arm. Install the control arm and lock it with the mounting bolts and tighten to 94-127 ft. lbs. (128-167 Nm). In the case of lower control arms, once again raise the vehicle and axle housing with the help of a jack. Take off the lower control arm-to- chassis bolt, lower control armto-axle housing bolt, lower control arm-to- nut and take off the lower control arm. Lastly, hook on the bottom control arm and screw in the mounting bolts and screw in the mounting bolts to 101-127 ft. lbs. (137-167 Nm).
Related Mazda B2200 Parts
 Mazda B2200 Axle Shaft
 Mazda B2200 Axle Support Bushings
 Mazda B2200 Ball Joint
 Mazda B2200 Shock Absorber
 Mazda B2200 Strut Housing
 Mazda B2200 Suspension Strut Rod
 Mazda B2200 Sway Bar Bracket
 Mazda B2200 Sway Bar Bushing
 Mazda B2200 Sway Bar Link Bushing
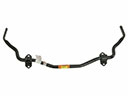 Mazda B2200 Sway Bars
 Mazda B2200 Torsion Bar
 Mazda B2200 Wheel Seal
Browse by Year
1993 Control Arm
1992 Control Arm
1991 Control Arm
1990 Control Arm
1989 Control Arm
1988 Control Arm
1987 Control Arm