×
- Hello
- Login or Register
- Quick Links
- Live Chat
- Track Order
- Parts Availability
- RMA
- Help Center
- Contact Us
- Shop for
- Mazda Parts
My Garage
My Account
Cart
Genuine Mazda Fuel Pressure Regulator
Fuel Tank Pressure Regulator- Select Vehicle by Model
- Select Vehicle by VIN
Select Vehicle by Model
orMake
Model
Year
Select Vehicle by VIN
For the most accurate results, select vehicle by your VIN (Vehicle Identification Number).
47 Fuel Pressure Regulators found


Mazda Fuel Pressure Valve Part Number: L3K9-13-2J0
$194.36 MSRP: $259.19You Save: $64.83 (26%)Ships in 1-2 Business DaysProduct Specifications- Other Name: Valve, Pressure


Mazda Damper Part Number: BP4W-20-180
$154.91 MSRP: $206.59You Save: $51.68 (26%)Ships in 1-2 Business DaysProduct Specifications- Other Name: Damper, Pulsation

Mazda Fuel Pressure Regulator Part Number: PEAR-13-280
$36.51 MSRP: $48.69You Save: $12.18 (26%)Ships in 1-2 Business DaysProduct Specifications- Other Name: Pressure Regulator, Fuel; Pressure Regulator

Mazda Fuel Pressure Regulator Part Number: LFB6-13-280
$44.66 MSRP: $59.56You Save: $14.90 (26%)Ships in 1-2 Business DaysProduct Specifications- Other Name: Pressure Regulator, Fuel

Mazda Fuel Pressure Regulator Part Number: L3M8-13-280
$44.66 MSRP: $59.56You Save: $14.90 (26%)Ships in 1-2 Business DaysProduct Specifications- Other Name: Pressure Regulator, Fuel

Mazda Regulator Part Number: PX4P-13-780
$18.36 MSRP: $24.49You Save: $6.13 (26%)Ships in 1-2 Business DaysProduct Specifications- Other Name: Valve, Air Relief; Pressure Valve

Mazda Fuel Pressure Regulator Part Number: PYFL-13-780
$50.45 MSRP: $67.28You Save: $16.83 (26%)Ships in 1-2 Business DaysProduct Specifications- Other Name: Valve, Air Relief
- Position: Driver Side


Mazda Fuel Pressure Regulator Part Number: PAF1-13-280
$52.06 MSRP: $69.44You Save: $17.38 (26%)Ships in 1-2 Business DaysProduct Specifications- Other Name: Pressure Regulator, Fuel; Pressure Regulator, Regulator
- Position: Driver Side

Mazda Fuel Pressure Regulator Part Number: CA38-13-280
$83.25 MSRP: $111.02You Save: $27.77 (26%)Ships in 1-2 Business DaysProduct Specifications- Other Name: Pressure Regulator, Fuel; Pressure Regulator

Mazda Fuel Pressure Regulator Part Number: CA41-13-280
$88.88 MSRP: $118.53You Save: $29.65 (26%)Ships in 1-2 Business DaysProduct Specifications- Other Name: Pressure Regulator, Fuel; Pressure Regulator

Mazda Fuel Pressure Regulator Part Number: CY03-13-280
$94.69 MSRP: $126.27You Save: $31.58 (26%)Ships in 1-2 Business DaysProduct Specifications- Other Name: Pressure Regulator, Fuel; Pressure Regulator

Mazda Vapor Valve Part Number: CC43-42-A80A
$107.01 MSRP: $142.71You Save: $35.70 (26%)Ships in 1-2 Business DaysProduct Specifications- Other Name: Valve, Fuel Vapor.

Mazda Fuel Pressure Regulator Part Number: PAF3-13-280
$114.05 MSRP: $152.10You Save: $38.05 (26%)Ships in 1-2 Business DaysProduct Specifications- Other Name: Pressure Regulator, Fuel; Pressure Regulator, Pressure Valve, Regulator

Mazda Pressure Regulator, Fuel Part Number: PXFV-13-280
$129.14 MSRP: $172.22You Save: $43.08 (26%)Ships in 1-2 Business DaysProduct Specifications- Other Name: PRESSURE RG.,FUEL; Pressure Regulator

Mazda Fuel Pressure Regulator Part Number: BP4W-13-280B
$194.11 MSRP: $258.88You Save: $64.77 (26%)Ships in 1-2 Business DaysProduct Specifications- Other Name: Pressure Regulator

Mazda Pulse Dampener Part Number: BP4X-20-180
$154.91 MSRP: $206.59You Save: $51.68 (26%)Ships in 1-2 Business DaysProduct Specifications- Other Name: Damper, Pulsation
Mazda Damper Part Number: N3H1-20-180
$81.36 MSRP: $108.51You Save: $27.15 (26%)Ships in 1-2 Business DaysProduct Specifications- Other Name: Damper, Pulsation
Mazda Fuel Pressure Regulator Part Number: FP47-13-280C
$102.83 MSRP: $137.12You Save: $34.29 (26%)Ships in 1-2 Business DaysProduct Specifications- Other Name: Pressure Regulator
Mazda Fuel Pressure Regulator Part Number: JE07-13-280A
$191.94 MSRP: $255.97You Save: $64.03 (26%)Ships in 1-2 Business DaysProduct Specifications- Other Name: Pressure Regulator
Mazda Fuel Pressure Regulator Part Number: FS05-13-280
$194.04 MSRP: $258.78You Save: $64.74 (26%)Ships in 1-2 Business DaysProduct Specifications- Other Name: Pressure Regulator
| Page 1 of 3 |Next >
1-20 of 47 Results
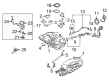
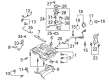
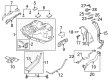
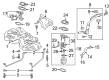
Mazda Fuel Pressure Regulator
Mazda Fuel Pressure Regulator maintains fuel rail pressure to ensure each engine is breathing the right mix for brisk acceleration and lean cruising. Mazda earned global respect since 1931 for peppy cars that combine rotary heritage, Skyactiv efficiency, and Kodo design that appears to be in motion even when stopped. It supports the show with i-Activsense safety and i-Activ AWD grip so your daily drives feel confident and fun. Mazda continues to tweak gasoline, hybrid, and electric powertrains, ever in pursuit of lighter weight and sharper responses, the result of which is a brand that allows owners to enjoy twisty roads without having to sacrifice mileage or reliability. Inside this spirit of innovation lurks the Fuel Pressure Regulator, a tiny spring diaphragm valve that reads the vacuum from the manifold and instantly opens or closes a return path to the tank, trimming rail pressure in harmony with the throttle angle. For every Mazda across the lineup, this Fuel Pressure Regulator prevents the surging of injectors, rich stumbles under pressure spikes, and lean misfires under increased demand, aiding clean emissions and smooth idle. When a Mazda driver tips in the gas, the regulator increases the pressure in milliseconds to get torque there without delay, then relaxes at cruise to save fuel, delivering the balanced performance that defines the brand.
You'll get great performance and real durability when you pick genuine OEM Fuel Pressure Regulator. Mazda builds these using high-quality materials and official factory methods to ensure they hold up mile after mile. You deserve that Mazda reliability without the headache of cheap knockoffs. It is easy to find exactly what you need in our huge inventory of genuine parts. Plus, every OEM part carries a real manufacturer's warranty for your peace of mind. You will love our low prices too. Order today and we will ship your brand-new parts fast. They often reach your door in just a few days.
Mazda Fuel Pressure Regulator Parts and Q&A
- Q: How to remove and install the fuel pressure regulator on Mazda B2200?A:In 4-cylinder engines, unbolt and remove the fuel pressure regulator, releasing pressure in the fuel system, first, disconnect the vacuum hose, followed by the fuel return hose and then unscrewed and removed the unit. To install, it will require undoing all the steps that were used to remove the parts and tightening the bolts to 95 inch lbs. (11Nm). In the case of a 3.0L engine, remove and install using the correct procedure. It is recommended to start with a 4.0L engine, and ease the pressure off of the fuel system, being careful to avoid a rush of pressure and prevent any spillage whilst being mindful of the safety precautions. Keep a Class B-C fire extinguisher in place. The second step is to first remove the vacuum and fuel lines at the pressure regulator followed by removing the 2 or 3 Allen retaining screws in the regulator housing. Installation/Removal Take off the pressure regulator assembly including the gasket and O-ring and remove the gasket, inspection of the O-ring to check that it has no cracks or deterioration. Installation, the gasket mating surfaces should be carefully cleansed to prevent damage, the new O-ring should be lubricated with a light engine oil (not silicone grease), a new gasket and the O-ring installed on the pressure regulator. Install the pressure regulator to the fuel manifold and screw the retaining screws to 6-8 ft. lbs. (8-11Nm) and reconnect the vacuum and fuel lines. Last but not the least, fill and fill fuel, turn ignition switch, ON, OFF, at least 6 times, making sure the ignition switch remains on not less than five seconds, and verify any leakage.
- Q: How to replace the fuel pressure regulator on Mazda MX-5 Miata?A:In the case of the models manufactured before 1997, the fuel pressure regulator is attached to the fuel rail. Starting with taking the fuel pressure off and loosening the cable of the negative terminal of the battery. Then unscrew the vacuum hose of regulator and put a metal container or a shop towel below the fuel return hose. Slide the clamp along the hose and pull out the fuel return hose off the regulator. Take off the pressure regulator mounting bolts and disconnect the pressure regulator to fuel rail. Install the pressure regulator on the fuels rail using a new O-ring, and it goes in the opposite order of how it was taken off. In models between 1999 and 2005 fuel pressure regulator is mounted on the fuel pump/fuel level sending unit. Verbeek: Disconnect the fuel level sending unit/fuel pump, the hose off the pressure regulator, the retaining bolt of the regulator and remove the regulator with installation being the opposite. In all models since 2006, the fuel pressure regulator is an inseparable part of the fuel pump/fuel level sending unit. In case of the regulator defect, it will require changing the whole fuel pump assembly. Begin by disconnection of the fuel pump/fuel level sending unit followed by replacement by the new fuel pump unit, fuel level sending unit and finish the process in the same reverse order.

Related Mazda Parts
 Mazda Air Filter
 Mazda Accelerator Pedal
 Mazda Fuel Filter
 Mazda Fuel Pressure Sensor
 Mazda Intake Manifold Gasket
 Mazda Fuel Filler Hose
 Mazda Fuel Injection Pump
 Mazda Fuel Injector O-Rings
 Mazda Fuel Tank Lock Ring
 Mazda Fuel Tank Strap
 Mazda Fuel Tank Vent Valve
 Mazda Vapor Pressure Sensor
Browse by Model
2 Fuel Pressure Regulator 3 Fuel Pressure Regulator 5 Fuel Pressure Regulator 6 Fuel Pressure Regulator 626 Fuel Pressure Regulator 929 Fuel Pressure Regulator B2200 Fuel Pressure Regulator B2300 Fuel Pressure Regulator B2600 Fuel Pressure Regulator CX-3 Fuel Pressure Regulator CX-30 Fuel Pressure Regulator CX-5 Fuel Pressure Regulator CX-50 Fuel Pressure Regulator CX-7 Fuel Pressure Regulator CX-70 Fuel Pressure Regulator CX-9 Fuel Pressure Regulator CX-90 Fuel Pressure Regulator Miata Fuel Pressure Regulator Millenia Fuel Pressure Regulator MPV Fuel Pressure Regulator MX-3 Fuel Pressure Regulator MX-5 Miata Fuel Pressure Regulator MX-6 Fuel Pressure Regulator Protege Fuel Pressure Regulator Protege5 Fuel Pressure Regulator RX-7 Fuel Pressure Regulator RX-8 Fuel Pressure Regulator Tribute Fuel Pressure Regulator