×
- Hello
- Login or Register
- Quick Links
- Live Chat
- Track Order
- Parts Availability
- RMA
- Help Center
- Contact Us
- Shop for
- Mazda Parts
My Garage
My Account
Cart
Genuine Mazda Protege Rocker Arm
Engine Rocker Arm- Select Vehicle by Model
- Select Vehicle by VIN
Select Vehicle by Model
orMake
Model
Year
Select Vehicle by VIN
For the most accurate results, select vehicle by your VIN (Vehicle Identification Number).
2 Rocker Arms found

Mazda Protege Rocker Arms Part Number: B541-12-150
$85.73 MSRP: $114.31You Save: $28.58 (25%)Ships in 1-2 Business DaysMazda Protege Rocker Arms Part Number: B541-12-130
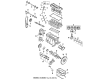
Mazda Protege Rocker Arm
Looking for Rocker Arm with proven quality? Choose OEM Rocker Arm. Mazda designs and builds them to strict factory specs. Every piece goes through rigorous quality checks. You'll get parts that fit right and work like new. Shop our huge inventory of OEM Mazda Protege parts. Enjoy the highly competitive prices online. Our site is your one-stop shop. Each genuine Protege part includes a manufacturer's warranty. Buy with confidence. Our return policy is simple and hassle-free. In a rush? Choose expedited delivery at checkout. You'll love the streamlined experience from search to checkout to receiving your order.
Mazda Protege Rocker Arm Parts and Q&A
- Q: How to remove and install the Camshaft, Rocker Arm and Valve Lifter on Mazda Protege?A:The first step to take is to remove either the distributor (until 1998) or the camshaft position sensor (after 1998) to remove the Valve Cover. The timing covers, Timing Belt, and camshaft sprocker(s) should then be removed. Check the clearance of the camshaft(s) using a dial indicator and in the event that the clearance is greater than what is required, change the camshaft thrust plate, camshaft, or the Cylinder Head. In the case of SOHC engines, remember that, the 1.6L and 1.8L models have hydraulic lash adjusters and so no additional valve adjustments would be necessary after fitting it. Mark or number parts to be kept aside so that they can fit back correctly. Loose the rocker arm bolts one at a time, and then detach the rocker arm and rocker shaft assembly and store them up to re-fit later. To take out the camshaft, but not the cylinder head, disconnect the distributor, air cleaner assembly, and relocate the underhood fuse box, and then just by simply pulling straight out and unscrewing the oil seal, the camshaft can be removed. In the DOHC type, 1.8L version has two overhead cams with hydraulic lifters and the 1.5L and subsequent models need shim adjustments. Take off the camshaft sprocket bolts and sprockets, loosen and take off the camshaft bearing caps, labeling the locations of their position to be used again. Record the depth of the old oil seal to install it properly in the future. Remove all the valve lifters or shim/bucket lifters and place them in labeled containers. Check all components to determine whether they are damaged, check camshaft journals and lobes, and oil clearance with Plastigage. To install, use clean engine oil over the new camshaft oil seal and into the cylinder head bore and then install the camshaft and rocker arm assembly, making sure the orientation is correct. Installing the camshaft sprocket and timing belt Installing the camshaft sprocket and timing belt involves tightening the rocker arm bolts. With DOHC engines, lubricate hydraulic lifters and place them in the correct position and then fit the camshafts and bearer caps sequentially and ensure that the bolts are screwed on in this order. Last are the camshaft sprockers, timing belt, and the distributor which should be installed and all things installed in the opposite order as they were removed, and the engine should be started to ensure that everything is working out.
Related Mazda Protege Parts
 Mazda Protege Belt Tensioner
 Mazda Protege Engine Mount
 Mazda Protege Oil Pan
 Mazda Protege Crankshaft
 Mazda Protege Crankshaft Pulley
 Mazda Protege Cylinder Head Gasket
 Mazda Protege Dipstick
 Mazda Protege Intake Valve
 Mazda Protege Oil Pan Baffle
 Mazda Protege Timing Chain Tensioner
 Mazda Protege Timing Cover Gasket
 Mazda Protege Valve Spring