×
- Hello
- Login or Register
- Quick Links
- Live Chat
- Track Order
- Parts Availability
- RMA
- Help Center
- Contact Us
- Shop for
- Mazda Parts

My Garage
My Account
Cart
Genuine Mazda B2200 Axle Shaft
Car Axle Shaft- Select Vehicle by Model
- Select Vehicle by VIN
Select Vehicle by Model
orMake
Model
Year
Select Vehicle by VIN
For the most accurate results, select vehicle by your VIN (Vehicle Identification Number).
2 Axle Shafts found

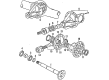
Mazda B2200 Axle Shaft Part Number: UB39-26-115A
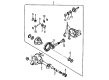
Mazda B2200 Axle Shafts Part Number: M0A7-27-700A
Mazda B2200 Axle Shaft
Looking for Axle Shaft with proven quality? Choose OEM Axle Shaft. Mazda designs and builds them to strict factory specs. Every piece goes through rigorous quality checks. You'll get parts that fit right and work like new. Shop our huge inventory of OEM Mazda B2200 parts. Enjoy the highly competitive prices online. Our site is your one-stop shop. Each genuine B2200 part includes a manufacturer's warranty. Buy with confidence. Our return policy is simple and hassle-free. In a rush? Choose expedited delivery at checkout. You'll love the streamlined experience from search to checkout to receiving your order.
Mazda B2200 Axle Shaft Parts and Q&A
- Q: Where can the identification number and rear axle identification code for the Axle Shaft be found on Mazda B2200?A:The identification number is stamped on a plate on the differential housing, while the rear axle shaft identification code is stamped on a metal tag hanging from one of the axle shaft cover-to-carrier bolts within the cover bolt circle.
- Q: How to remove and install the front Axle Shaft on Mazda B2200?A:When replacing or fitting parts to the B Series Pickup, it is necessary to first place the vehicle on a firm elevation and secure it before clearing the wheels and tires assembly. Then remove the drive flange hub, then the caliper, mounting support, and knuckle arm taking care to make sure that the caliper is not suspended by the brake hose. Unscrew the stabilizer bar and tie rod end, remove the lower mount of the shock absorber, snapring and spacer. Prop the lower arm of control with a jack, detach the upper ones and lower ones with ball joints, and the knuckle, and bend the control arm down to take the knuckle assembly and splash shield out. With a prybar, remove axle shaft out of the differential, but do not destroy the dust cover or oil seal. To install, apply a new clip to the axle shaft and lubricate the diffusion seal with clean transmission fluid before fitting the axle shaft making sure the seal is not ruined. Check, after installation, that the axle shaft is not pulled out. Install the knuckle and hub to the axle shaft and ball joints and then the spacer and new snapring, then re-install the rest of the parts in that order. In the case of the MPV, proceed with the same procedure and lift the vehicle and support it and then take off the wheel and tire assembly. Unscrew the axle shaft locknut, unscrew the tie rod end to the knuckle, and unscrew the caliper and the brake rotor, and hold the caliper in place. Take off the bottom ball joint and the knuckle/hub assembly out of the strut, maybe you need a used locknut to loosen an axle shaft that is stuck. Take off the splash shield and loosen the axle shaft out of the differential, once more taking care of the dust cover and oil cover. To install, a new clip must be placed on the axle shaft, the differential seal coated with clean transmission fluid and the axle shaft inserted with care not to damage the seal. Having ensured that the axle shaft is firmly in place, attach the knuckle/hub assembly to the strut and screw all the nuts to the correct amount of torque, reconnect all the other parts in the reverse order.
Related Mazda B2200 Parts
 Mazda B2200 Axle Pivot Bushing
 Mazda B2200 Axle Support Bushings
 Mazda B2200 Ball Joint
 Mazda B2200 Control Arm
 Mazda B2200 Differential Mount
 Mazda B2200 Leaf Spring
 Mazda B2200 Leaf Spring Bushing
 Mazda B2200 Shock Absorber
 Mazda B2200 Strut Mounts
 Mazda B2200 Sway Bar Link
 Mazda B2200 Torsion Bar
 Mazda B2200 Wheel Bearing
Browse by Year
1993 Axle Shaft
1992 Axle Shaft
1991 Axle Shaft
1990 Axle Shaft
1989 Axle Shaft 1988 Axle Shaft
1987 Axle Shaft