×
- Hello
- Login or Register
- Quick Links
- Live Chat
- Track Order
- Parts Availability
- RMA
- Help Center
- Contact Us
- Shop for
- Mazda Parts

My Garage
My Account
Cart
Genuine Mazda Tribute Shift Cable
Transmission Shift Cable- Select Vehicle by Model
- Select Vehicle by VIN
Select Vehicle by Model
orMake
Model
Year
Select Vehicle by VIN
For the most accurate results, select vehicle by your VIN (Vehicle Identification Number).
10 Shift Cables found
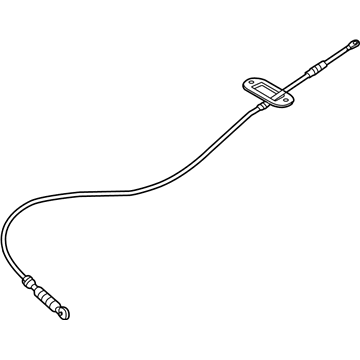
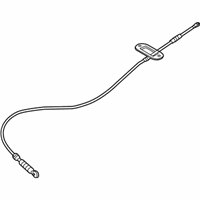
Mazda Tribute Control Cable Part Number: EF92-46-500B
$94.04 MSRP: $125.41You Save: $31.37 (26%)Ships in 1-2 Business Days
Mazda Tribute Shift Control Cable Part Number: ZZC0-46-150A
$51.86 MSRP: $69.17You Save: $17.31 (26%)Mazda Tribute Shift Control Cable Part Number: ZZDB-46-150
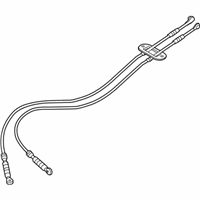
$117.86 MSRP: $157.18You Save: $39.32 (26%)Mazda Tribute Shift Control Cable Part Number: EC01-46-500E
Mazda Tribute Shift Control Cable Part Number: ZZD4-46-150
Mazda Tribute Shift Control Cable Part Number: ZZCB-46-150
Mazda Tribute Shift Control Cable Part Number: ZZCA-46-150
Mazda Tribute Shift Control Cable Part Number: ZZC4-46-150
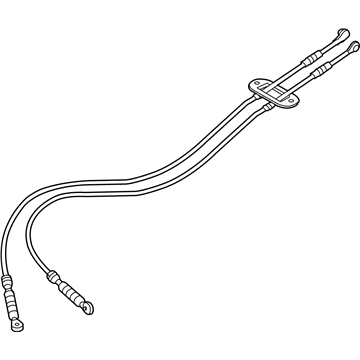
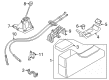
Mazda Tribute Control Cable Part Number: EF91-46-500B
Mazda Tribute Shift Control Cable Part Number: EC01-46-500F
Mazda Tribute Shift Cable
Mazda Tribute Shift Cable connects gears inside the vehicle to the transmission that are the actual driver's input that makes the gear chosen engage. The Shift Cable is a member of the mechanical linkage system that replaces rigid rods with flexible conduit and connects the shifter assembly to the transmission manual lever or shift fork levers. An inner wire can slide within an outer sheath, allowing the motion of a selector mounted on the floor or a column to be transferred to the transmission through a matching sliding movement. This in turn pivots a lever that appropriately positions the internal components into Park, Reverse, Neutral, Drive, Low, or a selected manual gear. As a result of the presence of a direct path of movement from the shifter mechanism to the transmission, the assembly retains commonly safety features found on many Mazda products. This includes a pair of interlocks. The first interlock prevents the shifter lever from leaving the Park position except when the ignition is on and the driver's foot is depressing the brake pedal. The cable is subject to bending, tension, and vibration every time the driver changes range, which can stretch, kink, or break the cable. This can produce a loose feel, a missed gear engagement, or an inability to shift. Frequent lubrication of the external pivots can minimize wear, and timely renewal restores accurate gear selection. Regardless of whether the Mazda Tribute is equipped with a manual transaxle that uses cables for the front wheel drive layout or an automatic transaxle that uses a selector lever, both rely on a strong and accurately adjusted cable to transfer movement. A properly working Shift Cable is critical for reliable driving control and consistent Mazda Tribute performance.
Looking for Shift Cable with proven quality? Choose OEM Shift Cable. Mazda designs and builds them to strict factory specs. Every piece goes through rigorous quality checks. You'll get parts that fit right and work like new. Shop our huge inventory of OEM Mazda Tribute parts. Enjoy the highly competitive prices online. Our site is your one-stop shop. Each genuine Tribute part includes a manufacturer's warranty. Buy with confidence. Our return policy is simple and hassle-free. In a rush? Choose expedited delivery at checkout. You'll love the streamlined experience from search to checkout to receiving your order.
Mazda Tribute Shift Cable Parts and Q&A
- Q:How to disconnect and adjust the shift cable on Mazda Tribute?A:For the 2004 and older A4s equipped with a column-mounted shifter, first disconnect the negative battery terminal and wait a few minutes. Take off the shrouds of the steering column. Disconnect the cable on the shift lever, and steering column bracket, by removing the C-clip, and pulling the cable end off the lever. In the engine compartment, detach the nuts attaching the cable to the firewall. Remove the shift cable from the shift lever and the transaxle mounting bracket. Now, remove the cable from the vehicle. You should install the machine as the reverse of removing it and adjust the cable as required. For the adjustment, the covers of the steering column being removed, gear lever and detent, place the 0.023 in (0.6mm) feeler gauge between them, when the gear lever is in Drive, hold this position. In order to adjust the cable on the selector ballstud, loosen the cable adjuster and adjust the cable while ensuring that the transaxle selector lever is in Drive before re-connecting the cable. Screw the cable adjuster tight, remove the feeler gauge and operate the shift lever in each position to check gears before refitting the steering column shrouds. After the battery reconnection, PCM has to relearn its idle/fuel mixture trim strategy. To remove the console-mounted shifter, first disengage the negative battery terminal. Then raise the vehicle, remove the left splash shield and place the shifter in Drive. After that, remove the snow shield located on the transaxle. Disconnect the cable from the adjustment screw on the shifter lever, remove the cable retainers and the floor console finish panel. Detach the grommet nuts that secure the cable body pass-through. Disconnect the cable from the shifter's ball stud, and release the cable housing from the shifter. Installing the new cable is the reverse process of removing it but remember to adjust it afterward. To carry out the adjustment, the negative battery terminal is to be disconnected and the vehicle raised. Next up, the left splash shield is to be removed. The shifter is to be placed in Drive. The shifter cable adjustment screw is to be loosened as well as the cable bracket nuts. Then, the shifter lever is to be aligned with the setting. The cable bracket nuts and then the shifter cable adjustment screw are to be tightened. After installing other parts, set the parking brake, lower the vehicle, and run it through each range to check the adjustment. For model years 2005 through 2007, first disconnect the negative battery cable. With the key turned to the On position, shift the vehicle into Drive and remove the center console. Now detach the shift cable from the shift lever and shift bracket. Remove the shift cable mounting nuts. In the engine compartment, loosen the mounting bolt of the Z-shaped bracket and detach the shift cable from the transaxle. Next, slide the cable behind the air conditioning ducts. Finally, pull the cable out from under the instrument panel. The process of installation is opposite removal. To adjust, remove the bolt and bracket from the shift cable at the transaxle. Move the adjuster up, rotate the adjustment sleeve counter-clockwise to unlock, place the shift lever into Drive, push down the shift lever at the transaxle until it stops, back up one click, rotate the adjustment sleeve clockwise to lock. Install the bracket and bolt. To remove the console trim for 2008 2012 models, disconnect the negative battery terminal and turn the key to the On position. Shift the gear selector into the Drive position. Then carefully pry the rectangular ring at the base of the shift lever upwards. Once you remove the inner tray from the rear of the center console, pry up and remove the top trim panel. Detach the shift cable from the shift lever and bracket, and nuts from the shift cable mounting and the shift cable retainer from the transaxle fill tube. Remove the shift cable from transaxle assembly; push in the two tabs on shift cable and slide it out of the bracket. Installation process is exactly opposite to removal process. To adjust the shift lever, disconnect the shift cable from the shift lever at the transaxle. Spread the tabs on the cable adjustment lock to release the lock. Rotate the shift lever clockwise until it stops. Then, rotate the shift lever counter-clockwise one click. Move the shift lever to Drive. Connect the end of the cable to the shift lever. Finally, slide the lock down to lock the adjustment. For 2013 and newer models, raise the vehicle and support it safely. Remove the center console. Pry the shift cable end from the shift lever. Remove the retainer that secures the shift cable housing. Remove the bolts and the driver-side floor to the center-console bracket. Take off the vehicle undercover; on FWD models, remove the air filter housing; on AWD models, remove the battery and battery tray. Take off the bolt that fastens the shift cable to the transaxle bracket, separate the shift cable from the shift lever and bracket, and for AWD models, take off the bolts and secure the exhaust hanger out of the way. Take off exhaust heat shield nuts, take the cable off the cable clip under the car, and take out the two nuts securing the shift cable grommet to the vehicle floor and pull the cable through the passenger compartment. The inverse process of uninstalling is referred to as "installing" and involves adjusting the shift cable afterwards. To complete the adjustment, the air filter housing for FWD models or the battery and battery tray for AWD models must first be removed. The cable end must then be disconnected from the shift lever at the transaxle. The cable adjuster is then unlocked by sliding the spring-loaded tab forward. The shift lever is then rotated clockwise until it meets a stop, before rotating it counter-clockwise one click. The shift lever is then moved to Drive, before connecting the cable end to the shift lever. The lock is then slid downward to secure the adjustment.
- Q:How to remove and install the shift cable on Mazda Tribute?A:Take out the shift lever and center console. Follow the cables to the floor and undo the interior grommet. While working inside of the engine compartment, remove the retaining clips from the shift cable and then pull the shift cables off the transaxle levers. Detach the retainer cable from the retainer bracket by pulling away the black pin. Next, lift the cable off the bracket. Lift the front of the car and place it on jackstands securely. Next, remove the nuts on the shift cable retaining bracket. Carefully remove the shift cables from the vehicle one by one inside the engine compartment. The process of installing is the opposite of removing.
Related Mazda Tribute Parts
 Mazda Tribute Automatic Transmission Filter
 Mazda Tribute Automatic Transmission Shift Levers
 Mazda Tribute Clutch Disc
 Mazda Tribute Clutch Fork
 Mazda Tribute Clutch Hydraulic Lines
 Mazda Tribute Clutch Master Repair Kit
 Mazda Tribute Clutch Release Bearing
 Mazda Tribute Flywheel
 Mazda Tribute Pilot Bearing
 Mazda Tribute Transmission Assembly
 Mazda Tribute Transmission Gasket
 Mazda Tribute Transmission Pan