×
- Hello
- Login or Register
- Quick Links
- Live Chat
- Track Order
- Parts Availability
- RMA
- Help Center
- Contact Us
- Shop for
- Mazda Parts

My Garage
My Account
Cart
Genuine Mazda Tribute Transmission Assembly
Trans Assembly- Select Vehicle by Model
- Select Vehicle by VIN
Select Vehicle by Model
orMake
Model
Year
Select Vehicle by VIN
For the most accurate results, select vehicle by your VIN (Vehicle Identification Number).
16 Transmission Assemblies found
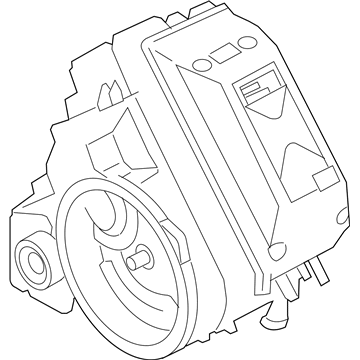
Mazda Tribute Transaxle Part Number: ZZCK-19-090R-00
$1131.43 MSRP: $1485.11You Save: $353.68 (24%)Ships in 1-2 Business Days
Mazda Tribute Transaxle Part Number: ZZDC-19-090R-00
$5020.15 MSRP: $6830.80You Save: $1810.65 (27%)
Mazda Tribute Transaxle Part Number: ZZCC-19-090R-0A
$548.77 MSRP: $720.31You Save: $171.54 (24%)Ships in 1-2 Business Days
Mazda Tribute Transaxle Part Number: ZPRD-19-090R
$785.00 MSRP: $1030.39You Save: $245.39 (24%)Ships in 1-2 Business DaysMazda Tribute Transaxle Part Number: ZPRC-19-090R
$1070.46 MSRP: $1405.08You Save: $334.62 (24%)Ships in 1-2 Business DaysMazda Tribute Transaxle Part Number: ZZCD-19-090R-0A
$1125.08 MSRP: $1476.78You Save: $351.70 (24%)Ships in 1-2 Business DaysMazda Tribute Transaxle Part Number: ZPRF-19-090R
$1582.25 MSRP: $2076.87You Save: $494.62 (24%)Ships in 1-2 Business DaysMazda Tribute Transaxle Part Number: ZZDD-19-090R-00
$3572.62 MSRP: $4689.42You Save: $1116.80 (24%)Ships in 1-2 Business DaysMazda Tribute Transaxle Part Number: ZZEA-19-090A
Mazda Tribute Transaxle Part Number: ZZDB-19-090R-00
Mazda Tribute Transaxle Part Number: ZZCF-19-090R-00
Mazda Tribute Transaxle Part Number: ZZCE-19-090R-0A
Mazda Tribute Transaxle Part Number: ZPRG-19-090R
Mazda Tribute Transaxle Part Number: ZPRE-19-090R
Mazda Tribute Transaxle Part Number: ZPRB-19-090R
Mazda Tribute Transaxle Part Number: ZPNG-19-090R-0A
Mazda Tribute Transmission Assembly
Looking for Transmission Assembly with proven quality? Choose OEM Transmission Assembly. Mazda designs and builds them to strict factory specs. Every piece goes through rigorous quality checks. You'll get parts that fit right and work like new. Shop our huge inventory of OEM Mazda Tribute parts. Enjoy the highly competitive prices online. Our site is your one-stop shop. Each genuine Tribute part includes a manufacturer's warranty. Buy with confidence. Our return policy is simple and hassle-free. In a rush? Choose expedited delivery at checkout. You'll love the streamlined experience from search to checkout to receiving your order.
Mazda Tribute Transmission Assembly Parts and Q&A
- Q:How to remove the automatic Transmission Assembly on Mazda Tribute?A:to start removing the transaxle from 2004 and earlier models, first detach the cable from the negative terminal of the battery and remove the air filter housing. Remove connectors for the transmission range sensor and upstream oxygen sensor. Then remove the shift cable from the transaxle shift lever. Take off the bracket for the transaxle wire harness and shift cable. Next, detach the battery ground cable at the transaxle and remove the starter. At the transaxle end of the engine, attach a lifting hook to an engine support fixture or use a bolt if a hook is unavailable. Take away the accessible bolts from the transaxle to engine and upper rear transaxle mounts. Elevate the vehicle, detach the wheels and the under-vehicle splash shield(s), drain the transaxle lubricant, and disconnect the driveaxles. Take out the front section of the exhaust system and the subframe crossmember. Then, remove the dampener from the longitudinal crossmember. In 4WD models, the transfer case and torque converter inspection cover are removed. Identify the torque converter's relation to the driveplate and undo the driveplate-to-torque converter nuts. Take off the fluid cooler hoses from the transaxle and mark and disconnect wires. Also remove the transaxle vent tube. In order to remove transaxle from engine support transaxle with a jack and remove remaining bolts securing it to engine. Manoeuvre transaxle out of engagement with dowel pins in engine block and lower. From 2005 to model year 2012, remove the battery and tray. Unplug wire connector from the car fire wall. Finally, follow similar steps to unbolt and remove transaxle. If you are working on a 2013 or newer vehicle, raise the vehicle and supply the support it requires. Remove the underbody cover. Disconnect and remove the transaxle as indicated by the steps that follow. Installation requires performing the reverse of removing. The installer ensures the torque converter is engaged with the transaxle fluid pump and makes sure the dowel pins are located. Tighten all bolts to spec. Insert the proper quantity and type of ATF into the transaxle and adjust the shift cable if necessary.
- Q:How to remove and install manual Transmission Assembly on Mazda Tribute?A:The 2012 and earlier models have manual transaxles. To remove 2004 and earlier models, they recommend starting with the battery and the battery tray, and continue with the air filter housing. Unplug the electrical connector for the backup light switch and, if required for 4WD models, unplug the shift cables from the transaxle shift levers. Detach the transaxle wire harness brackets and the vehicle speed sensor connector. Next, attach an engine support fixture to the lifting hook at the transaxle end of the engine. Remove the cylinder and line for the clutch release, and remove the rear transaxle mount through-bolt, left transaxle mount, and front transaxle mount. Detach the starter and the four upper transaxle-to-engine mounting bolts, then loosen the driveaxle/hub nuts and the wheel lug nuts, raise the vehicle and remove the wheels. Remove the transaxle lubricant, transaxle support insulator bracket and shift linkage bar (2WD only). Remove the subframe and longitudinal crossmembers with the left-side splash shields. For the 4WD models the transfer case will need to be removed. Support transaxle with a jack; remove bolts securing engine to transaxle; remove transaxle. For vehicles from model years 2005 through 2012, lift the vehicle, remove cable and battery and air filter housing, disconnect all wiring and shift cables, and fit the engine settling fixture. For models from 2005 to 2007, the technician must remove the rear transaxle mount, uppermost transaxle-to-engine bolts, crossmembers, wheel, left splash shield, and starter, then remove both driveaxles and the front transaxle mount. For 2008 through 2012 vehicles, remove the nuts from the left transaxle mount bracket. Next, remove the rear transaxle mount, the right engine mount, and the uppermost bolts transaxle-to-engine. Remove the wheel and the left splash shield Next, remove the crossmembers. Now remove the stabilizer bar links and remove both driveaxles. Using a support fixture, lift the engine slightly. Remove the lower transaxle-to-engine bolts, support the transaxle with a jack, and roll it away from the engine. When you install the transaxle, grease the input shaft with high-temperature grease, raise the transaxle into position carefully, and slide it forward until it engages the input shaft with the clutch. Do not force this action. When the transaxle is flush with the engine, install and tighten the transaxle-to-engine bolts. Then, follow the reverse order of removal for the remainder of the installation. Ensure all applicable bolts are tightened to the specified torque values. Finally, fill the transaxle with the proper fluid.
Related Mazda Tribute Parts
 Mazda Tribute Shift Cable
 Mazda Tribute Transfer Case
 Mazda Tribute Automatic Transmission Filter
 Mazda Tribute Automatic Transmission Shift Levers
 Mazda Tribute Clutch Hydraulic Lines
 Mazda Tribute Clutch Release Bearing
 Mazda Tribute Clutch Slave Cylinder
 Mazda Tribute Flywheel
 Mazda Tribute Pilot Bearing
 Mazda Tribute Pressure Plate
 Mazda Tribute Transmission Gasket
 Mazda Tribute Transmission Pan