×
- Hello
- Login or Register
- Quick Links
- Live Chat
- Track Order
- Parts Availability
- RMA
- Help Center
- Contact Us
- Shop for
- Mazda Parts
My Garage
My Account
Cart
Genuine Mazda Windshield
Glass Windshield- Select Vehicle by Model
- Select Vehicle by VIN
Select Vehicle by Model
orMake
Model
Year
Select Vehicle by VIN
For the most accurate results, select vehicle by your VIN (Vehicle Identification Number).
84 Windshields found


Mazda Windshield Part Number: KB7W-63-900C
$602.99 MSRP: $810.64You Save: $207.65 (26%)Ships in 1-2 Business DaysProduct Specifications- Other Name: Glass, Windshield
- Replaces: KB7W-63-900, KB7W-63-900B, KB7W-63-900A

Mazda Windshield Part Number: KA0H-63-900
$642.72 MSRP: $878.20You Save: $235.48 (27%)Ships in 1-2 Business DaysProduct Specifications- Other Name: Glass, Windshield
Mazda Windshield Part Number: KB8C-63-900C
$814.30 MSRP: $1112.65You Save: $298.35 (27%)Ships in 1-2 Business DaysProduct Specifications- Other Name: Glass, Windshield
- Replaces: KB8C-63-900B, KB8C-63-900A, KB8C-63-900
Mazda Windshield Part Number: KN3L-63-900C
$698.06 MSRP: $953.83You Save: $255.77 (27%)Ships in 1-2 Business DaysProduct Specifications- Other Name: Glass, Windshield
- Replaces: KN3L-63-900A, KN3L-63-900B

Mazda Windshield Part Number: EG21-63-900L
$831.70 MSRP: $1136.43You Save: $304.73 (27%)Ships in 1-2 Business DaysProduct Specifications- Other Name: Glass, Windshield
- Replaces: EG21-63-900K, EG21-63-900L-9U, EG21-63-900H, EG21-63-900J

Mazda Windshield Part Number: BJM5-63-900A
$390.03 MSRP: $524.34You Save: $134.31 (26%)Ships in 1-2 Business DaysProduct Specifications- Other Name: Glass, Windshield
Mazda Windshield Part Number: KD33-63-900E
$576.39 MSRP: $774.87You Save: $198.48 (26%)Ships in 1-2 Business DaysProduct Specifications- Other Name: Glass, Windshield
- Replaces: KD33-63-900B, KD33-63-900D, KD33-63-900A, KD33-63-900C

Mazda Windshield Part Number: DR61-63-900
$611.74 MSRP: $835.88You Save: $224.14 (27%)Ships in 1-2 Business DaysProduct Specifications- Other Name: Glass, Windshield
Mazda Windshield Part Number: KD35-63-900D
$620.22 MSRP: $847.47You Save: $227.25 (27%)Ships in 1-2 Business DaysProduct Specifications- Other Name: Glass, Windshield
- Replaces: KD35-63-900B, KD35-63-900C, KD35-63-900A
Mazda Windshield Part Number: KC9E-63-900B
$620.22 MSRP: $847.47You Save: $227.25 (27%)Ships in 1-2 Business DaysProduct Specifications- Other Name: Glass, Windshield
- Replaced by: KC9E-63-900C
Mazda Glass, Windshield Part Number: KD3A-63-900C
$620.55 MSRP: $847.92You Save: $227.37 (27%)Ships in 1-2 Business DaysProduct Specifications- Other Name: Windshield
- Replaces: KD3A-63-900B, KD3A-63-900, KD3A-63-900A

Mazda Windshield Part Number: GS3M-63-900B
$632.23 MSRP: $863.87You Save: $231.64 (27%)Ships in 1-2 Business DaysProduct Specifications- Other Name: Glass, Windshield
- Replaces: GS3M-63-900A
Mazda Windshield Part Number: BPM5-63-900C
$663.16 MSRP: $906.12You Save: $242.96 (27%)Ships in 1-2 Business DaysProduct Specifications- Other Name: Glass, Windshield
- Replaces: BPM5-63-900B
Mazda Windshield Part Number: BJS8-63-900C
$665.49 MSRP: $909.32You Save: $243.83 (27%)Ships in 1-2 Business DaysProduct Specifications- Other Name: Glass, Windshield
Mazda Windshield Part Number: KJ04-63-900B
$678.36 MSRP: $926.91You Save: $248.55 (27%)Ships in 1-2 Business DaysProduct Specifications- Other Name: Glass, Windshield
- Replaces: KJ04-63-900, KJ04-63-900A
Mazda Windshield Part Number: BADE-63-900
$682.90 MSRP: $933.11You Save: $250.21 (27%)Ships in 1-2 Business DaysProduct Specifications- Other Name: Glass, Windshield
Mazda Windshield Part Number: KD3D-63-900C
$698.06 MSRP: $953.83You Save: $255.77 (27%)Ships in 1-2 Business DaysProduct Specifications- Other Name: Glass, Windshield
- Replaces: KD3D-63-900B, KD3D-63-900A, KD3D-63-900
Mazda Windshield Part Number: BACS-63-900
$699.46 MSRP: $955.75You Save: $256.29 (27%)Ships in 1-2 Business DaysProduct Specifications- Other Name: Glass, Windshield

Mazda Windshield Part Number: GRV1-63-900A
$733.27 MSRP: $1001.93You Save: $268.66 (27%)Ships in 1-2 Business DaysProduct Specifications- Other Name: Glass, Windshield
- Replaces: GRV1-63-900

Mazda Windshield Part Number: TD11-63-900D
$740.28 MSRP: $1011.53You Save: $271.25 (27%)Ships in 1-2 Business DaysProduct Specifications- Other Name: Glass, Windshield
- Replaces: TD11-63-900C-9U, TD11-63-900C
| Page 1 of 5 |Next >
1-20 of 84 Results
Mazda Windshield
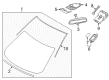
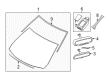
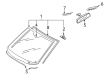
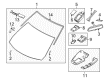
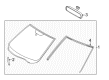
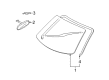
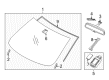
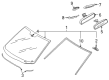
The Mazda Windshield acts as a clear safety shield that preserves forward vision while bolstering cabin protection from debris and harsh weather. Mazda built its reputation on rotary engines, Skyactiv efficiency and the flowing Kodo design, offering cars and SUVs that feel agile, sip fuel and look sculpted in motion. Drivers appreciate how Mazda pairs i-Activsense aids with playful steering, giving confidence on winding roads or daily commutes. Ongoing exploration of electric drive and i-Activ AWD systems shows Mazda pushing for cleaner power without losing its fun-to-drive DNA, so every trip feels spirited yet responsible. Complementing these brand traits, the Windshield uses laminated safety glass with a tough plastic layer bonded between two curved sheets, resisting shatter and blocking flying stones at highway speeds. This structure keeps occupants safer, adds rigidity to the body case and even guides airflow smoothly up the roof, a subtle help to overall efficiency. Slight factory tint limits glare and protects the cabin from UV, keeping eyes relaxed during long drives. Because scratches or clouding can reduce clarity over time, selecting a high-quality replacement ensures the original level of impact absorption and optical sharpness. In this way the Mazda Windshield delivers universal value across the lineup, matching the brand's balance of performance, style and safety.
You'll get great performance and real durability when you pick genuine OEM Windshield. Mazda builds these using high-quality materials and official factory methods to ensure they hold up mile after mile. You deserve that Mazda reliability without the headache of cheap knockoffs. It is easy to find exactly what you need in our huge inventory of genuine parts. Plus, every OEM part carries a real manufacturer's warranty for your peace of mind. You will love our low prices too. Order today and we will ship your brand-new parts fast. They often reach your door in just a few days.
Mazda Windshield Parts and Q&A
- Q: Why is it advisable to leave the replacement of the windshield and fixed glass to a dealer or a shop specializing in glass work on Mazda Protege?A:Replacement of the windshield and fixed glass requires the use of special fast-setting adhesive/caulk materials and some specialized tools, making it advisable to leave these operations to a dealer or a shop specializing in glass work.
- Q: How to properly remove and reinstall a rear windshield on Mazda RX-7?A:Open the hatch fully and disconnect the negative battery cable at the battery. Remove the forward portion of the rear window trim, then pull the weather stripping off the rear end of the roof and lower the headliner slightly to access the hatch hinges. Disconnect the electrical connector for the rear defroster from the rear pillar. While an assistant supports the rear end of the hatch, disconnect the damper stay nut where the damper meets the side pillar. Carefully close the rear glass hatch and move to the inside of the car to scribe around the hinge attaching nuts with a pen or metal scribe to locate the glass in its original position. Remove the hinge attaching nuts, release the hatch lock, and with assistance, lift the hatch, dampers, and hinges off the car as a unit. If necessary, remove the damper stays, hinges, and hatch lock from the glass hatch. If replacing the damper stays, ensure the old units are not punctured or placed in an open fire due to their high-pressure gas and oil content; dispose of them properly at a Mazda dealer or local fire department. Before installing the hatch, install any components removed from the glass, then place the hatch into position and loosely install the hinge nuts without tightening. Align the hinge attaching nuts with the marks made during disassembly and tighten until snug, then lower the hatch to check for proper alignment at the sides and where the hatch striker meets the hatch lock at the rear. Adjust the glass hatch as necessary for proper alignment and securely tighten the hinge nuts. Connect the damper stays to their mountings on the rear pillar and reconnect the electrical connectors for the defroster. Wrap the material headliner around the metal lip of the hatch until tight, then press the weather stripping over the material and metal lip, taking time to smooth out any wrinkles. Install the rear window trim piece, connect the negative battery cable, and check for proper operation of the defroster.


Related Mazda Parts
 Mazda Grille
 Mazda Tachometer
 Mazda Door Lock
 Mazda Car Mirror
 Mazda Door Hinge
 Mazda Door Latch Assembly
 Mazda Lift Support
 Mazda Liftgate Lock Actuator
 Mazda Side View Mirrors
 Mazda Tailgate Lock
 Mazda Windshield Washer Fluid Reservoir
 Mazda Windshield Washer Nozzle
Browse by Model
2 Windshield 3 Windshield 5 Windshield 6 Windshield 626 Windshield 929 Windshield B2300 Windshield B2500 Windshield B3000 Windshield B4000 Windshield CX-30 Windshield CX-5 Windshield CX-50 Windshield CX-7 Windshield CX-9 Windshield Miata Windshield MPV Windshield MX-3 Windshield MX-5 Miata Windshield Protege Windshield Protege5 Windshield RX-7 Windshield RX-8 Windshield Tribute Windshield