×
- Hello
- Login or Register
- Quick Links
- Live Chat
- Track Order
- Parts Availability
- RMA
- Help Center
- Contact Us
- Shop for
- Mazda Parts

My Garage
My Account
Cart
Genuine Mazda 3 Transmission Assembly
Trans Assembly- Select Vehicle by Model
- Select Vehicle by VIN
Select Vehicle by Model
orMake
Model
Year
Select Vehicle by VIN
For the most accurate results, select vehicle by your VIN (Vehicle Identification Number).
33 Transmission Assemblies found

Mazda 3 Transaxle Part Number: F0YN-03-000R-V0
$3368.50 MSRP: $4573.99You Save: $1205.49 (27%)Ships in 1-2 Business Days
Mazda 3 Transaxle Part Number: CA04-03-000
$1639.42 MSRP: $2240.11You Save: $600.69 (27%)Ships in 1-2 Business DaysMazda 3 Transaxle Part Number: ZP4R-19-090R-V0
$2763.66 MSRP: $3747.54You Save: $983.88 (27%)Mazda 3 Transaxle Part Number: CAT3-03-000
$1287.77 MSRP: $1759.60You Save: $471.83 (27%)Ships in 1-2 Business Days
Mazda 3 Transaxle Part Number: C659-03-000
$1563.30 MSRP: $2136.08You Save: $572.78 (27%)Ships in 1-2 Business DaysMazda 3 Transaxle Part Number: CC37-03-000
$2386.61 MSRP: $3261.05You Save: $874.44 (27%)Ships in 1-2 Business DaysMazda 3 Transaxle Part Number: FSKB-03-000
$2809.25 MSRP: $3838.54You Save: $1029.29 (27%)Ships in 1-2 Business DaysMazda 3 Transaxle Part Number: FSKA-03-000
$2837.38 MSRP: $3876.97You Save: $1039.59 (27%)Ships in 1-2 Business DaysMazda 3 Transaxle Part Number: G2Y0-03-000A
$2423.46 MSRP: $3282.71You Save: $859.25 (27%)Ships in 1-2 Business Days
Mazda 3 Automatic Transmission Complete Part Number: EXX7-03-000
$2448.70 MSRP: $3317.19You Save: $868.49 (27%)Ships in 1-2 Business DaysMazda 3 Automatic Transmission Complete Part Number: ET13-03-000
$3465.20 MSRP: $4734.83You Save: $1269.63 (27%)Ships in 1-2 Business DaysMazda 3 Transaxle Part Number: FWZ6-03-000
$2621.53 MSRP: $3553.34You Save: $931.81 (27%)Ships in 1-2 Business DaysMazda 3 Automatic Transmission Complete Part Number: E2X1-03-000A
$2621.53 MSRP: $3553.34You Save: $931.81 (27%)Ships in 1-2 Business DaysMazda 3 Automatic Transmission Complete Part Number: E1Y1-03-000A
$2672.96 MSRP: $3623.62You Save: $950.66 (27%)Ships in 1-2 Business DaysMazda 3 Automatic Transmission Complete Part Number: E1Y0-03-000A
$2672.96 MSRP: $3623.62You Save: $950.66 (27%)Ships in 1-2 Business DaysMazda 3 Transaxle Part Number: C643-03-000
$3783.78 MSRP: $5170.13You Save: $1386.35 (27%)Ships in 1-2 Business DaysMazda 3 Transaxle Part Number: ZP4K-19-090R-V0
$2800.38 MSRP: $3797.73You Save: $997.35 (27%)Mazda 3 Automatic Transmission Complete Part Number: E4Y2-03-000A
$2814.52 MSRP: $3817.05You Save: $1002.53 (27%)Ships in 1-2 Business DaysMazda 3 Automatic Transmission Complete Part Number: E4Y1-03-000A
$2814.52 MSRP: $3817.05You Save: $1002.53 (27%)Ships in 1-2 Business DaysMazda 3 Automatic Transmission Complete Part Number: E2YJ-03-000A
$2855.57 MSRP: $3873.14You Save: $1017.57 (27%)Ships in 1-2 Business Days
| Page 1 of 2 |Next >
1-20 of 33 Results
Mazda 3 Transmission Assembly
Looking for Transmission Assembly with proven quality? Choose OEM Transmission Assembly. Mazda designs and builds them to strict factory specs. Every piece goes through rigorous quality checks. You'll get parts that fit right and work like new. Shop our huge inventory of OEM Mazda 3 parts. Enjoy the highly competitive prices online. Our site is your one-stop shop. Each genuine 3 part includes a manufacturer's warranty. Buy with confidence. Our return policy is simple and hassle-free. In a rush? Choose expedited delivery at checkout. You'll love the streamlined experience from search to checkout to receiving your order.
Mazda 3 Transmission Assembly Parts and Q&A
- Q:How to remove and install a automatic Transmission Assembly on Mazda 3?A:The transaxle can be removed by first disconnecting the cable from the negative battery terminal. Next, remove the upper engine cover by pulling it up from both sides and lifting it off the mounting posts. Next, remove the battery and battery tray, followed by the air filter housing and duct. Unplug the TCM harness from the range sensor at the TCM connector and the ground straps. Remove the bolts that attach the electrical harness to the transaxle. Detach the shift cable from the transaxle shift control arm. Remove the bolts and nut securing the transaxle cable securing mount. Remove the transaxle wire harness and bracket from the rear of the transaxle. If equipped, disconnect electrical connectors for vehicle speed sensors and engine oil pressure switch and transmission oil pressure switch from the wire harness. Eliminate the fastener, tube, and dipstick from the engine for 5-speed applications. Attach an engine support fixture to the transaxle end of the engine lifting hook, or use a bolt of the appropriate size and thread pitch if no hook is supplied. Detach the five upper bolts that secure the engine to the transaxle. Next, loosen the nuts on the driveaxle/hub and the wheel lug nuts. Proceed to raise the front of the vehicle and support it securely on jackstands. Then, remove the wheels. Take off the lower splash shields and the left-hand and right-hand splash aprons from the fenderwells; disconnect the shift cable from the transaxle and remove the shift cable bracket bolts. Follow these guidelines to remove the starter, transaxle cooler, and driveaxles, before disconnecting the tie-rods, stabilizer bar link, and lower ball joints. Take off the rear mount through-bolt and mount. Next, take off the three bolts that hold the transaxle support insulator bracket. Drain the transaxle lubricant. Disconnect and plug the transmission fluid hoses. Remove the transaxle mount and support the transaxle with a jack (preferably a transmission jack and safety chains). Using the starter mounting hole, mark the converter driveplate relationship, remove the converter mounting nuts, and continue to remove the lower bolts securing the transaxle to the engine. To disengage the transaxle from the engine block dowel pins, first, move the transaxle away from the engine. Then, lower the transmission jack to the floor and remove the transaxle. When installing the torque converter, reverse the removal procedure. Ensure that the drive tangs on the torque converter engage correctly in the recesses located in the automatic transaxle fluid pump inner gear. Also, make sure to align the matchmarks on the torque converter and driveplate. After that, install all driveplate-to-torque converter nuts before tightening them. Subsequently, tighten them to specification. After that, tightened the transaxle mounting bolts, suspension crossmember mounting bolts, driveaxle/hub nuts and wheel lug nuts to the specified torque, filled the transaxle with the correct type and amount of automatic transmission fluid, and adjusted the shift cable.
- Q:How to remove and install a manual Transmission Assembly on Mazda 3?A:To detach the transaxle you will first need to disconnect the cable from the negative battery terminal, followed by the removal of the upper engine cover. This is done by lifting it up from each side and pulling it off the mounting posts in the center. Remove the battery battery tray, air filter housing, and air duct next. Unplug the electrical connectors for back-up lighting and shift cables from the transaxle shift arms. The wire harness bracket of the transaxle should be removed, and the electrical connector of the vehicle speed sensor is disconnected. Remove the four upper engine-to-transmission mounting bolts. An engine support fixture is now attached to the lifting hook at the transaxle end of the engine. Use a proper sized and thread pitch bolt to attach the chain of the support fixture to a hole at the end of the cylinder head if no hook is available. Loosen the driveaxle/hub nuts and the wheel lug nuts; then raise the front of the vehicle and support it on jackstands before removing the wheels. Take off the lower splash shields, drain the transaxle lubricant, disconnect the clutch release cylinder and line from the transaxle and remove the clutch cable mounting bracket bolts. Take off the starter and driveaxles, then unbolt the tie-rods, stabilizer bar link and lower balljoints. Detach the transaxle mount, the through-bolt at the rear mount, and three bolts that secure the transaxle support insulator bracket; support the transaxle with a jack, preferably a transmission jack. To remove the transaxle, you must first remove any remaining lower bolts that hold the transaxle in connection with the engine and move the transaxle away from the engine to disengage it from the engine block dowel pins. Lastly, lower the transmission jack slowly to the floor to remove the transaxle. To perform installation procedures, add a small amount of high-temperature grease to the input shaft. Secure the transaxle to a jack, raise it into position directly behind the engine, and slide the transaxle forward so that the input shaft engages the clutch. It is important to avoid using excessive force. If the input shaft does not readily locate, adjust the angle of the transaxle or turn the input shaft to engage the splines. Once the transaxle is flush against the engine, install the transaxle-to-engine bolts and torque to specification, Do not use the bolts to force the transaxle and engine together. The rest of the installation consists of reversing the removal procedures, ensuring that the suspension crossmember mounting bolts, driveaxle hub nuts, starter mounting bolts, and wheel lug nuts are all tightened to their specified torque values.
Related Mazda 3 Parts
 Mazda 3 Clutch Slave Cylinder
 Mazda 3 Flywheel
 Mazda 3 Shift Cable
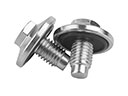 Mazda 3 Transmission Drain Plug
 Mazda 3 Transmission Pan
 Mazda 3 Automatic Transmission Filter
 Mazda 3 Automatic Transmission Shift Levers
 Mazda 3 Clutch Release Bearing
 Mazda 3 Clutch Slave Repair Kit
 Mazda 3 CV Joint Companion Flange
 Mazda 3 Pilot Bearing
 Mazda 3 Transmission Gasket
Browse by Year
2024 Transmission Assembly 2023 Transmission Assembly 2022 Transmission Assembly 2021 Transmission Assembly
2020 Transmission Assembly
2019 Transmission Assembly
2018 Transmission Assembly
2017 Transmission Assembly
2016 Transmission Assembly
2015 Transmission Assembly
2014 Transmission Assembly 2013 Transmission Assembly 2012 Transmission Assembly 2011 Transmission Assembly 2010 Transmission Assembly 2009 Transmission Assembly
2008 Transmission Assembly
2007 Transmission Assembly
2006 Transmission Assembly 2005 Transmission Assembly 2004 Transmission Assembly