×
- Hello
- Login or Register
- Quick Links
- Live Chat
- Track Order
- Parts Availability
- RMA
- Help Center
- Contact Us
- Shop for
- Mazda Parts
My Garage
My Account
Cart
Genuine Mazda 6 Valve Lifter
Lash Adjuster- Select Vehicle by Model
- Select Vehicle by VIN
Select Vehicle by Model
orMake
Model
Year
Select Vehicle by VIN
For the most accurate results, select vehicle by your VIN (Vehicle Identification Number).
2 Valve Lifters found

Mazda 6 Valve Lifters Part Number: 1F20-12-300B
$14.75 MSRP: $19.66You Save: $4.91 (25%)Ships in 1-2 Business Days
Mazda 6 Valve Lifters Part Number: PYFA-12-1A0A
$68.08 MSRP: $90.79You Save: $22.71 (26%)Ships in 1-2 Business Days
Mazda 6 Valve Lifter
Looking for Valve Lifter with proven quality? Choose OEM Valve Lifter. Mazda designs and builds them to strict factory specs. Every piece goes through rigorous quality checks. You'll get parts that fit right and work like new. Shop our huge inventory of OEM Mazda 6 parts. Enjoy the highly competitive prices online. Our site is your one-stop shop. Each genuine 6 part includes a manufacturer's warranty. Buy with confidence. Our return policy is simple and hassle-free. In a rush? Choose expedited delivery at checkout. You'll love the streamlined experience from search to checkout to receiving your order.
Mazda 6 Valve Lifter Parts and Q&A
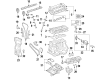
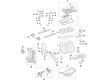
- Q: What preparations are necessary before removing the camshaft and valve lifter for a procedure on Mazda 6?A:In case the camshafts need to be taken out during a procedure, it is best to check the valve clearances before they are removed in case any new lifters needed cannot be ordered out of a dealership. Start with the Timing Chain and take a note of the location of the no.1 cylinder cam lobes and the slots in the ends of the camshafts so that they can be aligned in the same place upon re-installation. Take out the camshaft sprockets discarding the washers and marking the camshaft phaser/sprocket on the intake camshaft which can be reinserted correctly. The camshaft bearing caps use a single-digit number beginning with the exhaust caps with the 0 through the 4 and intake ones with 5-9; be sure to place them back in the correct locations. Bend the camshaft bearing cap bolts slightly, and loosen them, one after another, and take them off, marking each, and take out the camshafts, noting which one is the intake camshaft by its reference lobe. Keep the lifters in small containers so that they are not mixed. Check the camshafts, lifters, wear, and lifters diameters, and excessive wear in the Cylinder Head bores. Valve clearances might have to be adjusted in case the valve components of the engine are noisy. Inspect the bearers and camshaft lobes visually and record the diameter of each journal. Test plastigage bearing journal running clearance and where there is excess clearance on any bearing, change camshaft or cylinder head accordingly. In order to verify the check camshaft endplay, the bearings must be cleaned, the camshafts installed, and the endplay to be measured using a dial indicator. To install, ensure that the crankshaft is at TDC, oil the lifter bores and the camshaft bearing surfaces, and then fit the lifters and camshafts in their original positions. Should the locating dowels be firmly in place, and all mating surfaces clean. On the journal of the cams and lobes, apply some oil, attach the bearing caps to the correct locations and connect the bolts in a specific order and to the recommended Torque values. Lastly, fit the sprocket assembly and finish the reassembly process, such as the timing chain and the valve timing and ensure the valve clearances are observed before fitting the valve cover.


